• Laser Trainer Plinking Party!

    Apr 1 • Reviews • 6720

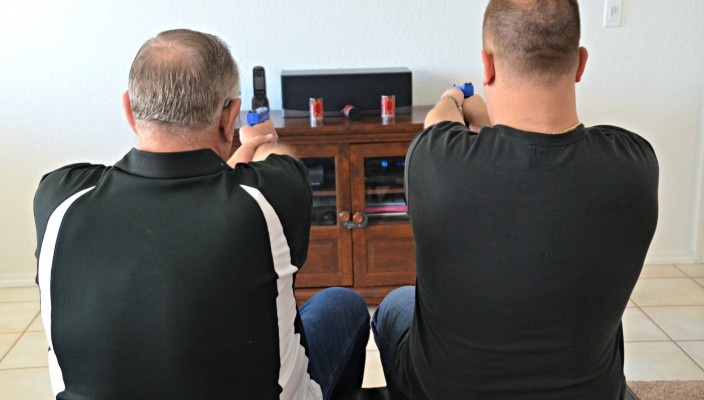
    Dry fire training can get monotonous and boring really fast.  Although ammunition has been easier to find recently, these past few years have definitely experienced a market shortage.  LaserLyte and other manufacturers have been updating their Laser Trainer products over the last few years, and boy are they fun!  No need to spend a bunch of money on ammo, and you can even play with them indoors.  We went ahead and tried some of these products out, and can see the benefits of owning this type of device, both for practice, AND for recreation!  For this review, we chose to go with all LaserLyte products, but there are other manufacturers making these types of Laser Trainers available for dry-fire training.


    Laser Trainers
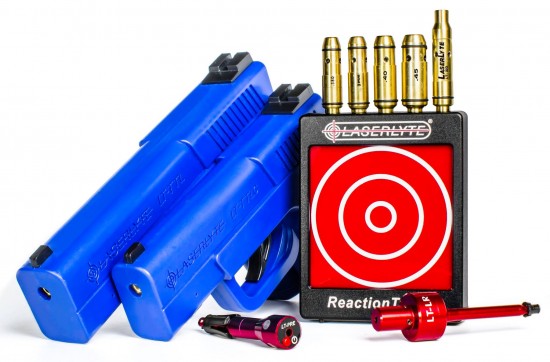
     

    laserlyte trainers

    LaserLyte Offers A Great Selection Of Products


    There are a few different options for Laser Trainers, depending on how much you’re looking to invest.  There are dummy training guns with the laser built in; cartridges that are chambered into the weapons like regular ammo; and there are inserts that slide into the end of your barrel.


    Laser Trainer Blue Dummy Guns


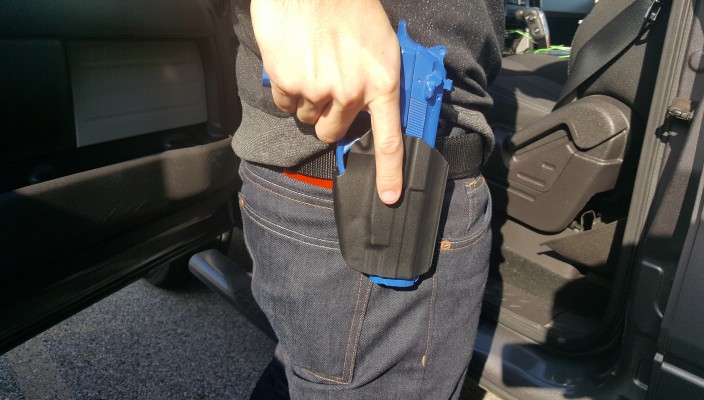
    LaserLyte offers a couple of different dummy gun models;  The Trainer Trigger Tyme® Laser Compact – LT-TTLC; and The Trainer Trigger Tyme® Laser Full Size – LT-TTL.  Both of these products feel fairly realistic, with one being similar to a compact auto-pistol, and the other being similar to a full sized auto-pistol.  Both of these devices have a similar weight and feel of an actual firearm, which assists with proper training of muscle memory.  They are an “all in one” unit, so simply insert the batteries, and let the fun begin!


    Laser Trainer Cartridge


    These devices replace your standard ammo, and provide a quick laser burst when struck by the weapons’ firing pin. They are available in most popular calibers, and some also double as a laser boresighter.  The only downfall with these models is the need to “rack” the slide on single action semi-auto pistols and rifles after every dry fire.


    Laser Trainer Barrel Inserts


    Laser trainer barrel inserts allow you to use the device with many different firearms. These model simply slide into muzzle, and are sound activated, so the laser turns on momentarily when the trigger is pulled.  They are usually available in a couple of sizes, such as the LaserLyte .22 Caliber Laser Trainer LT-LR and the LaserLyte Premium Pistol Laser Trainer, .35-.45 Caliber LT-PRE.  These are good for single action semi-auto pistols, since the device is inserted into the muzzle; and racking the slide will not cycle the trainer out of the weapon (like the cartridge could).


    Laser Trainer Replacement Parts


    Some even replace a few gun parts, such as the Laserlyte Laser Trainer Barrel for Glock, and the LaserLyte Ar Traing Kit Handle, Laser Block, Rod LT-C556. The LaserLyte Trainer Barrel for Glocks is only available for a few of the more popular Glock 17/22 and 19/23  models. This device replaces the whole barrel, which also assures the user that the weapon is unable to be loaded with live rounds.


    opplanet-laserlyte-laser-trainer-barrel-for-glock-19-23-lt-gm-main

    Laserlyte Laser Trainer Barrel for Glock 19/23 LT-GM


    The AR15 Trainer actually replaces the charging handle, and includes a piece that is inserted into the buffer tube. These are safety devices that also ensure that a live round cannot be loaded while the weapon is set up for use with the laser trainer.


    opplanet-laserlyte-new-ar-traing-kit-handle-laser-block-rod-lt-c556

    LaserLyte Ar Traing Kit Handle, Laser Block, Rod LT-C556


    Since both Glocks and ARs have striker style firing mechanisms, you will have to rack the slide or the charging handle before each shot.  However, these products are designed for continuous use, so the user can charge the weapon as many times as they want without the device needing to be reinserted into the weapon’s chamber.


    Laser Trainer Targets


    Like the trainers, there are quite a few target options to choose from…


    Bullseye Styles


    TLB-XL and TLB-1 Bullseye Target  


    opplanet-laserlyte-score-tyme-target-laser-trainer-tlb-xl-main

    LaserLyte TLB-XL


    The first model we tested was the TLB-1 by LaserLyte. This is a bullseye style target, which offers a “delayed” reaction. You have your large bullseye at the top of the device. In the lower left corner is another small sensor labeled “display”. The target does not immediately register your hits, as it is intended for the user to “focus on their next shot, not their last.” When you shoot the display sensor with the laser trainer, all of your landed shots will light up in the bullseye. In the lower right hand corner is the “reset” sensor. Just like the display sensor, aim at and hit this sensor with the laser to reset the device. This literally means that you can sit on your couch all day practicing trigger control and grouping. You never have to get up to reset the target! LaserLyte also offers the TLB-XL, which is a newer model in the lineup, and is twice the size as the TLB-1. LaserLyte also offers a few more functions in the XL, such as a score display; and the option to play timed games in 5, 10, or 15 second increments. It still has the display and reset controls accessible via laser sensors in the trainer target itself, so the only need to get up off of the couch is to access the power on/off toggle switch on the side!


    Reactive Targets


    Situational Awareness


    opplanet-laserlyte-color-changing-target-sit-awareness-tlb-cg-main

    LaserLyte Color Changing Target for Situational Awareness TLB-CG


    This model is intended to train users in a situational awareness setting. To score on this model, you have to hit the target when it flashes green or blue. You get 1 point for each hit. You do NOT want to shoot the target when it flashes red or yellow, as this will take 1 point away each time. These patterns are completely random, making it a great reactive target training device. This model can be a ton of fun with a group of equally minded, competitive friends!


    Plinking Cans


    opplanet-laserlyte-new-tip-over-can-3-pack-tlb-bwc

    LaserLyte Tip Over Can, 3 Pack TLB-BWC


    The LaserLyte Tip Over Cans have a laser sensor that records your hits. There is a little plunger that is motor driven, and when the sensor is hit, the motor pushes the plunger out to knock the can over almost instantly! The plinking cans were probably the most fun we had with the laser trainers. There’s just something about your target falling over when you hit it that makes this feel closer to live ammunition shooting. The only downfall is having to set the cans back up after they’ve all been knocked over!


    Reaction Tyme Trainer


    opplanet-laserlyte-lts-reaction-tyme-target-for-use-with-laser-training-systems-main

    LaserLyte LTS Reaction Tyme Target TLB-RT


    Also offered is the LaserLyte LTS Reaction Tyme Target. This target is intended to teach real world reactive training. The target lights up for a random duration between 3-7 seconds. When the target is lit, that means that the shooter should shoot the target. The target beeps 2 times when the shooter hits the target.  These targets can be set up almost anywhere, and you can continue to use them without having to get out of your seat to reset anything.


    Reflective Targets


    opplanet-laser-ammo-reflective-targets-set-of-6-6mrt

    Laser Ammo Reflective targets 6MRT


    We understand that some serious shooters may view these types of targets as “toys”, and a bit pricey at that. Some manufacturers have a much less expensive option, and those are the Reflective Laser Targets. These laser trainers have a huge positive to them, no matter which brand you go with: They are excellent at teaching trigger control. One thing that we noticed immediately with newer shooters was the inability to activate the laser without “streaking”, or pulling the gun/trainer in a certain direction while pulling the trigger. Within a few trigger pulls, the user gets instant feedback, and can correct whatever the issue is. They can continue to practice their trigger pull, and with a reflective target, simply get the muscles to memorize what is needed to fire a consistent dot in the same place, over and over.


    How did they work?


    We had a ton of fun playing with these products! They are great for rainy day training, and almost entirely safe to use indoors (just don’t point the laser in anyone’s eyes!) Some of our beginner shooters used the instant feedback from the trainer pistol, and were able to improve the steadiness of their trigger pull in a matter of seconds. We used the products in the picture above, along with the barrel insert, which was inserted into the muzzle of my Taurus 65 Revolver. I used snap caps along with the trainer, and the laser reacted as it should have. We did notice that the barrel insert acted a bit erratically at first, and the dot would sometimes seem as though it was not at the same brightness. Once we took around 100 shots with the insert, the laser was performing consistently. The pistol trainer with the built in laser worked consistently with every trigger pull.


    Overall, the Plinking cans were the most fun, simply because there is an instant reaction when the sensor is hit. The Bulls Eye target was also great to work on our grouping, and it seemed as though the target displayed our hits fairly accurately. The Situational Awareness target was also very satisfying to use, since this device adds a score display. The display allows you to gauge how well you are doing instantly, and is the type of product you can have a whole bunch of fun with your friends!


    No Comments on Laser Trainer Plinking Party!

    Read More
  • Lost the Battle, But Won the Gear War?

    Mar 30 • Reviews • 3931

    It’s not how you stand by your car that matters, it’s how you race it. Regardless if it’s cars, motorcycles, guns, or any other hobby, only the uninitiated are impressed solely by the equipment you own. If you don’t have the skills and training to use it effectively, the best gear in the world won’t save you. Conversely, you don’t always need the best equipment if you have developed your skills. Take Kalani Laker, who won the 2014 Walking Dead Multigun using the OPMOD Strikefire instead of an optic costing two or three times as much. If you want to develop your skills though, you need to train. Since this is the Gear Expert, I’m going to highlight some training gear.

    You don't get to this level without practice

    You don’t get to this level without practice

    If you want to be fast, first become smooth. One of the best ways to do that is dry fire practice. Whether you use a blue gun to practice safe movements with a firearm or snap caps so that you can include good trigger mechanics, there are numerous options to help you improve your skills safely. Laser training devices have really taken off in the past couple years and have proven to be an effective teaching tool. There are replacement barrels and training cartridges to use with your actual firearm, or there are dedicated training pistols so that you don’t have to manually reset the trigger after every shot on DOA pistols. Most recently, the target options for laser trainers has seen expansion. At SHOT show, there were several products that used a camera and software to record the laser impact and recommend technique adjustments.

    Color Changing Target for Situational Awareness

    Color Changing Target for Situational Awareness

    There are also some great target options for live fire practice that can help you improve your abilities. I try to exclusively use any type/brand of “splatter” paper targets that show the ring of your impact in a highly visible color, since they let me confirm that I’m on target without having to break my sight picture. There are also paper targets that aren’t just a silhouette or bullseye, but have a variety of targets on them so you can perform drills. Law Enforcement Targets has several of these targets. The command targets are great for if you go shooting with a friend. Steel targets are another great training tool, if you have the right setup for them, as they give an audible hit confirmation and can help you focus on developing speed. Polymer targets are a great for this as well, offering the high round count durability similar to steel but at a fraction of the cost. I like the polymer ground targets for working on tracking a moving target for the follow up shot.

    High Visibility Silhouette

    High Visibility Silhouette

    Part of training is the ability to be ready for anything, which includes an injury. The most important tip I can offer here is to at least carry the basics to handle minor cuts/wounds. Every range bag should have an Individual First Aid Kit (IFAK). While there are tons of awesome first aid kit options out there, this is an area where you should absolutely get professional training before investing in an extensive med kit. You can quickly do more harm than good if you try to use advanced equipment that you haven’t been trained to use.

    HSGI Bleeder/Blowout Pouch

    HSGI Bleeder/Blowout Pouch

    My goal in 2016 is to take as many training classes as I can, especially in areas where I need improvement. I encourage you to assess your skill set and do the same. There are tons of quality classes on all types of skill sets being offered all over the nation, so finding one shouldn’t be a challenge. But since most skills degrade over time without practice, just taking a training course once isn’t sufficient.  Take the classes and learn the fundamentals, then we can set you up with the gear to maintain and hone your skills in a fun and safe way.


    No Comments on Lost the Battle, But Won the Gear War?

    Read More
  • Thermal, So Hot Right Now

    Mar 23 • Reviews • 6096

    Thanks to Hollywood, everyone knows what “Thermal Vision” is right? Thermal Vision is how the Predator always gets his man and it can only be defeated by covering yourself in mud (assuming your name is Dutch). In the real world though, we call it Thermal Imaging and it isn’t so easy to hide from. Thermal imagers detect variations in infrared energy and since all objects emit infrared energy as a function of their temperature, they can be a very useful tool whether you are trying to find someone who is lost or hunt down a pack of invasive feral hogs. Here are some exciting thermal imaging products that are new to the market.

    Torrey Pines Logic Mini Thermal Imager

    Torrey Pines Logic Mini Thermal Imager

    FLIR sets the bar in the thermal industry and this time they did so by lowering the price barrier. The FLIR Scout TK is a pocket sized monocular that delivers the quality you expect from FLIR at a price you wouldn’t have believed possible even a year or two ago. The Scout TK can detect a man up to 100 yards away, has multiple color palette displays, and can capture pictures or videos. Perfect for in the tree stand or when you are out on the boat, the Scout TK brings thermal vision into your life at an affordable price.

    FLIR Scout TK

    FLIR Scout TK

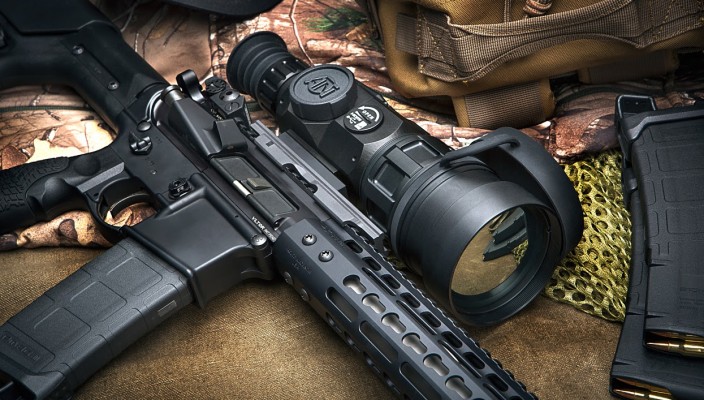
    ATN also has some exciting news for anyone who has been saving up for their first thermal and it is called the Thor HD. A weapon mounted thermal scope for less than $2,500 would have been a pipedream a few years ago, but today it is a reality.  Packed with all the same features as the Gen II X-sight, the Thor HD offers a lot for a game changing price. The range estimation tool and the Recoil Activated Video capture were two features of the new Obsidian II Core that I really liked, besides the price of course. ATN is looking to make big waves with the Obsidian II Core and I think the Thor HD will be their vanguard.

    ATN Thor HD 1.5-5x

    ATN Thor HD 1.5-5x

    Armasight impressed everyone with the Predator last year, so maybe some of you thought they’d take it easy this year. Not even close. Since they already have the Q14, a thermal monocular smaller than a PVS 14, they must have decided they need a thermal clip on to match. The Apollo Mini gives you the ability to convert a day scope into a thermal scope without all the size and weight of a traditional clip on unit. Just because it is small, doesn’t mean it is lacking features. The Apollo Mini is equipped with a digital compass and inclinometer which allows it estimate range to target. The unit also has a wireless remote and DVR compatibility, just like the full size Apollo units. The biggest thing about the Apollo Mini is the price point but when compared to the value that the unit offers, it makes sense.

    Armasight 336

    Armasight Apollo Mini

    Thermal imagers are increasing in performance and decreasing in size and cost every year. There are options available for almost every application and budget, which makes it hard to find a valid reason not to own one. If you aren’t sure what the best options for you are then send over an email and we can narrow down your choices. If you’re still worried about the Predator, try hiding behind glass or under water (both reflect infrared energy).

    Thermal Image with Color

    Thermal Image with Color

    If it emits infrared energy, thermal can see it.


    No Comments on Thermal, So Hot Right Now

    Read More
  • The $200 Binocular Challenge! Two Great Entry Level Binoculars

    Mar 22 • Reviews • 9161


    Much like any optic, Binoculars can be a tough category to shop for.  They range in price from $20 to thousands of dollars, so we can understand how daunting it is to decipher what is considered a “good” starting point.  In our experience and opinion, a good pair of entry level binoculars will cost the user just around $200.  And when we say “good,” we are referring to a product that will last you for years.  Sure, there are plenty of binoculars under this price point, but as with any category: you definitely get what you pay for!


    For this review, we chose two binoculars by two of our most popular manufacturers.  These models were the only ones tested for this article, and do not represent the myriad of choices in the $200 price range.  However, they are both an excellent choice for this starting point, and we have no problems recommending either model.  So let’s take a look at what we came up with…


    The Nikon Prostaff 7s And The Vortex Crossfire


    IMG_0018

    Nikon ProStaff 7s on the left; Vortex Crossfire on the right


    We chose both of these models in the 10x42mm option, since this is a fairly common magnification and objective size for both shooters, wildlife observers, and sports fans.  The 10 power is a weak enough magnification that there is still minimal vibration transferred from the user to the optic, yet it is strong enough for a birder to get nice and close to their subject, if that subject is within 50 meters or so.  Both of these models are also newer to the market, with the Crossfires becoming available in mid 2015, and the ProStaffs releasing in the first weeks of 2016.


    Nikon Prostaff 7s 10x42mm: Unboxing and First Impressions


    IMG_0013

    Nikon ProStaff 7s 10X42mm


    New for 2016 is the Nikon Prostaff 7s.  Back in the Spring of 2014, I personally had the pleasure of working at the NRA Show in Indianapolis as a Retail Partner with Nikon Sport Optics.  Having already been in the retail side of the industry for around 4 years at that point, I was very familiar with the Nikon Sport Optics line.  However, a very common discussion I had most of the weekend was how attendees didn’t even know that Nikon had a Sport Optics division!


    As was expected, the Prostaff felt really solid straight out of the box.  The rubber armor is noticeably tacky, which is how all rubber armoring should feel.  This material and checkered pattern allows the user to get a great grip on the optic, whether it’s wet or cold.  The twist up eyecups felt extremely solid.  There are 4 eyecup settings:  turned all the way in (for users with eyeglasses); then 3 more heights for regular use.  While turning the eyecups, you can feel the 3 different height settings, and they also provide an audible clicking sound for each setting.  The clicks easily ensure that the eyecups will always be at the exact same height.


    ProStaff Eye Cups Tallest Setting

    ProStaff Eye Cups Tallest Setting


    The Nikon includes hard plastic lens covers.  The ocular (eye piece) covers fit fairly loose to the eyecups, but the accordion piece that hold the eyepiece covers together does provide some friction, which helps the covers stay in place.  The objective (front lens) covers were of the same hard plastic material, and fit into the inside part of the objective barrel.  The tackiness of the armor will hold these in place, yet we did experience the covers popping out rather easily and unintentionally.  If you do not thread the neck strap through the tabs on the front covers, there could be an issue of these popping out and being easily misplaced, or even lost in the field.   The neck strap included to carry the optics was not padded, but it would be good for a few hours of use.  If you’re intending to hike around all day with an optic like this, we always recommend upgrading to a binocular harness.  The Nikon ProStaff Bino Harness is a great choice for an added accessory!


    IMG_0016

    ProStaff Lens Covers removed


    Vortex Crossfire 10x42mm: Unboxing and First Impressions


    IMG_0022

    Vortex Crossfire 10X42mm


    Though a newer manufacturer to the market than Nikon, Vortex Optics has been making quality products for some time now.  They are a reputable manufacturer that we count on to make a couple of our OPMOD products: the Vortex OPMOD SPARC II Red Dot Sight, as well as the Vortex OPMOD StrikeFire II Red/Green Dot w/Cantilever Mount.  Both of these products are without a doubt some of our best selling optics.  Vortex also has one of the best warranties in the market, with their VIP Warranty.  Though most manufacturers will only cover their products in the event of defects in materials or workmanship, Vortex will replace or repair their products as long as the damage is not deliberate.  No receipt needed, and the warranty is good on any Vortex product, no matter who bought it, for the life of the product.


    The first thing we noticed when unboxing the Vortex Crossfire was the quality of the included accessories.  The carrying case had a plastic buckle enclosure, and also had plastic D-rings sewn into the side to use the included nylon carrying strap.  It also included a padded, lightweight neck strap, which can be used all day long.  Also, the included lens covers were very impressive.  Both the ocular (eyepiece) and objective (front) covers are made from flexible, soft rubber, and stretch around both ends of the binocular.  The Vortex objective covers tether around the outside portion of the binocular tube.  This is a great design, and ensures that these covers are not misplaced or lost.


    Crossfire Lens Caps Removed

    Vortex Crossfire Lens Caps Removed


    The rubber armoring on the Crossfire was not as tacky as the Nikon, but it still provided plenty of grip.  The material used also felt very dense, so it will definitely protect against bumps and dings experienced while hiking or tracking your game.  There are large indentations on the bottom of each barrel, and they provide an excellent reference point for the user to know where their thumbs should go.  Though the eyecups didn’t have the audible clicks that the Nikon had, they still went all the way in and out with great fluidity.  This allows the user to set the eyecups at their most comfortable setting.


    Crossfire Eye Cups Tallest Setting

    Crossfire Eye Cups Tallest Setting


    Field Test


    With all that out of the way, we can now get into the meat and potatoes of the reviews!


    Overall feel of focusing mechanism


    Both models have a focus knob that turns around 1.5 times.  The diopter adjustment on both models are on the right eye, and they felt identical.  The Nikon seemed to have a slightly finer focus, but this was only slightly noticeable in our field test.  While focusing in on our test chart, the Nikon seemed to stay in focus for a longer period while turning the knob, and the Vortex seemed to lose focus while adjusting their knob the same amount.  However, both models were extremely clear when in focus.


    Testing the focus and clarity


    We went out and tested these glasses by viewing a sheet of paper with the font in different point sizes. The paper included both words and numbers for the testers to focus on.


    At 50 feet, all 3 testers were able to read up to the 16pt line, though the sight picture was noticeably shaky.  Both models have Tripod ports on the front hinge, and can be used with any tripod as long as a tripod adapter is available.  The shakiness we experienced happens on all optics, so it certainly had nothing to do with the optics themselves.


    Vortex Binocular Tripod Adapter 400

    Vortex Binocular Tripod Adapter 400


    At 100 feet, all 3 testers were able to read the 20pt text and numbers.  Beyond that, the 10 power might have been too much magnification, as it was much harder to get a steady picture.  Both models were very crisp at this distance, but the Vortex was a little harder to keep in focus once the target had been acquired.  The Nikon model was easily focused, and still had leeway in the knob to provide more precise clarity.


    I personally used both products to look down to my street corner from my driveway, which is almost 1/4 of a mile.  At this distance, I was able to read the license plate on a car parked at the corner, as well as the house number on the residence at the end of the street.  I did have to steady myself on the back of my pickup truck, but both optics were considerably clear at that distance.


    I also used a pine tree about 1/8 of a mile from my location as a target, and with both optics, I was able to count the pine cones on a specified branch.  This was quite impressive.  At this same distance, I was able to follow a couple of birds hopping from branch to branch in the same tree.  From my location, without the binoculars, they appeared to be Crows.  However, when looking through either optic, I was able to identify these birds as Common Grackles.  These birds are much more colorful than a Crow, and there iridescent plumage was noticeable since I was able to get really close with the 10x magnification.  Both optics performed exceptionally well for this purpose.


    Overall Findings


    Let me just start by saying that both products worked extremely well as options in this price range.  They were virtually identical in specifications, as can be seen in the specification table below.  Both provided exceptional clarity, and both felt very well built.


    Nikon ProStaff 7s 10x42mm Vortex Crossfire 10x42mm
    MSRP $199.95 $229.00
    Focusing System Central Focus Central Focus
    Eye cups Twist-up Twist-up
    Magnification 10 x 10 x
    Objective Diameter 42 mm 42 mm
    Angular Field of View (Real) 6.2 ° 6.2 °
    FOV at 1000 yds 324 ft 325 ft
    Exit Pupil 4.2 mm 4.3mm
    Eye Relief 15.5 mm 15 mm
    Size (Length x Width) 6.4×5 inches 6×5.1 inches
    Weight 22.7 oz 23.3 oz
    Waterproof/Fogproof Yes Yes
    Coatings Fully Multi-Coated Eco-glass Lenses Fully Multi-Coated Lenses
    Diopter Single – right eye Single – right eye
    Tripod Adaptibility Yes – tripod port in front hinge Yes – tripod port in front hinge


    The Nikon Prostaff had very tacky rubber armor coating, making this model very easy to hold onto in any condition.  Though the included neck strap was not padded, it could certainly be used for a few hours of carrying.  If a more comfortable strap is needed, remember to add the Nikon ProStaff Bino Harness  to your order!


    The Vortex Crossfire includes a premium neck strap, and the armoring felt very solid.  The strap would provide no problems with carrying all day long, but we also carry the Vortex Binocular Harness Strap VTHARNESS, which we always recommend for anything other than casual use.


    Overall, the optical quality of both models seem identical to the naked eye. We do not have access to all of the fancy laboratory equipment to test these products “scientifically,” but we feel the best way to test these products was via a “layman.” Though all 3 testers have at least an intermediate level of optics knowledge, we’re certainly not field test “experts.”  However, we have no problems recommending either model to anyone looking for a great pair of binoculars at an excellent price!


    No Comments on The $200 Binocular Challenge! Two Great Entry Level Binoculars

    Read More
  • These Go To Eleven…I Mean 80

    Mar 16 • Reviews • 7131


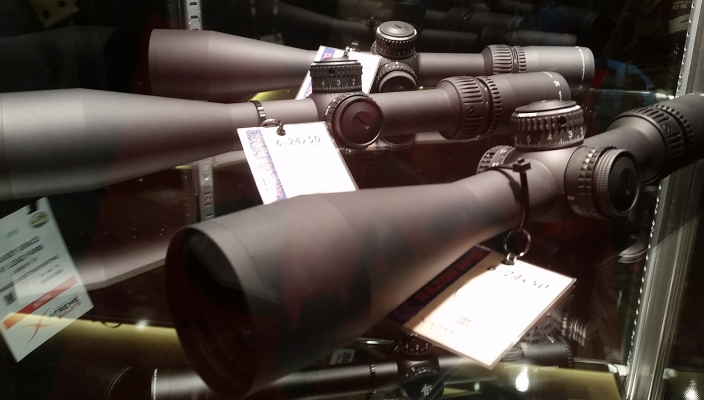
    In the 3-gun realm, where speed matters, low end magnification is a bigger concern than high end. 1-4x, 1-6x, and now 1-8x are the top recommended scopes. For long range precision shooting, another fast growing shooting discipline, high end magnification is what they crave. The majority of riflescope manufacturer’s don’t make models over 25x or 30x. At least that is what I would’ve told you before SHOT Show 2016. Now I know differently. There are many options, at various price points, for high magnification riflescopes.

    Range with long range opportunities

    Range with long range opportunities

    Just like most things, too much magnification can be a bad thing. The higher in power you go, the more variables you encounter (like mirage) that diminish your picture/resolution. So while there are riflescopes with more magnification than spotting scopes, they aren’t always the best option. The number one riflescope in Precision Shooting right now is the Vortex Razor HD Gen II 4.5-27×56, with the other 2 of the top 3 being the Nightforce ATACR 5-25×56 and the Kahles 6-24×56. Precision Rifle Blog compared the top used scopes here. The lesson there is that the quality of the glass, the coatings, and the turret adjustments should not be sacrificed for higher magnification.

    Vortex Razor HD Gen II 4.5-27x56

    Vortex Razor HD Gen II 4.5-27×56

    But if you are looking for higher magnification in a variable scope, there are some quality options. While not new, the Sightron SIII 10-50×60 is a fine scope to get started with or there is the Nightforce Benchrest 8-32×56 which is a great value. Vortex is catering to F-class shooters with the Golden Eagle 15-60×52 as is Burris with their XTR II 8-40×50, which has a very unique reticle that is worth checking out. All of these are great options for people with a reasonable entry level budget.

    Vortex Golden Eagle 15-60x52

    Vortex Golden Eagle 15-60×52

    If you have room to spend a bit more, the Nightforce Competition 15-55×52 or Kahles 10-50×56 are proven platforms that deliver high end, quality magnification. If you don’t want to lose the wide field of view on the low end magnification, the Sig Sauer Tango 6 5-30×56 was a new scope that I spent some time looking through and was quite impressed by their optics overall. Leupold also has you covered with their VX-6 7-42×56. While these are definitely a significant step up in budget for most of us, they are worth the extra coin.

    Kahles 10-50x56

    Kahles 10-50×56

    If you happen to have Trump for a last name, or some other circumstance that equates to money being no concern, here’s the cream of the crop. Zeiss really made a statement with their Victory V8 line that uses a 36mm tube diameter. Their V8 4.8-35×60 is a mid to long range dream. March Optics also made a big ripple at SHOT, stunning people not just with their quality but also with their 10 factor magnification scopes. They have a 2.5-25×56, a 5-50×56, and even an 8-80×56. The March Optics 10-60×56 is a great value in the tier 2 budget level as well.

    Zeiss Victory V8 4.8-35x60

    Zeiss Victory V8 4.8-35×60

    So whether you are on a tight budget or have the AMEX black card, reaching out to 1000yds is an achievable goal with plenty of glass options for you to obsessively compare. While high end magnification seems to be an increasing consumer desire, don’t feel the need to give in. For the longest time, military snipers redefined long range precision with nothing more than a 10x scope. Need a modern reference? The highly respected, and rightly so, Leupold Mark series does not offer anything above 25x.

    Burris F Class MOA Reticle

    Burris F Class MOA Reticle

    So if you’ve come down with the long range fever, figure out a budget and try to stick to it. Magnification doesn’t guarantee a hit, but it can be helpful. At the end of the day, experience on the range is more valuable than the best scope money can buy, so don’t let your options overwhelm you. You can always upgrade the optic later and should be able to find a long range neophyte looking for a bargain on your used glass.


    600 yds? Send it

    600 yds? Send it


    They are always looking for more people to join the 1000yd club.


    No Comments on These Go To Eleven…I Mean 80

    Read More