• 4 Must Have Upgrades for Your AR-15

    Apr 7 • News • 122426

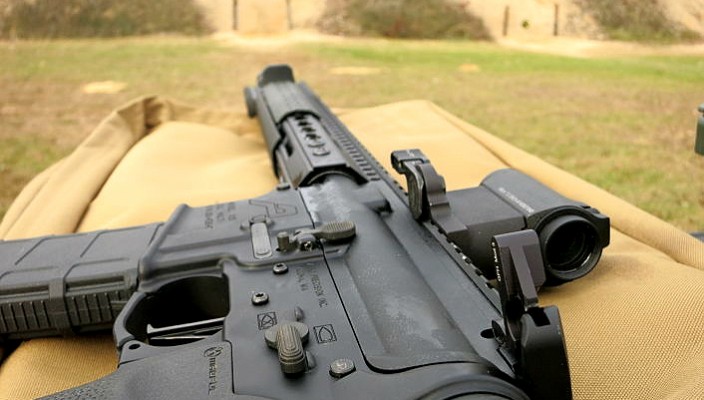
    Call me crazy but I’m one of those guys that popped out of the womb wondering how everything works, which later resulted in me wanting to take everything apart regardless of its price tag or overall stock badassness. So when I first got the opportunity to buy an AR15, that’s exactly what I did, took the whole rifle apart, pin by pin and put it back together. What I learned and what many of you reading this can probably agree is the AR is a fairly simple operating platform and that ultimately means for us tinkerers, it’s easy to work on. And since it’s so straightforward and you happen to have some fun money set aside, whether or not to upgrade that AR isn’t even a question. Because that fun money isn’t infinite and you’ll want to get the proverbial “best bang for the buck” out of your AR upgrade budget, here’s my picks for the top 4 parts you gearheads should slap on that 5.56 millimeter copper jacketed lead thrower.


    Adjustable Gas Block

    opplanet-jp-enterprises-750-adjustable-gas-block-stainless-steel-black-jpgs-5b-main


    As my highly regarded idol Ricky Bobby would say, “I wanna go fast” and like him I wanna shoot fast. In order to put those rounds on target as fast as possible and accurately, the number one priority is to reduce muzzle rise. One of the easiest ways to do that is tune the amount of gas that’s pushing your bolt carrier back and the velocity at which its going into the buffer tube. If we can slow down the speed at which that bolt is flying back into your shoulder it will in turn cut down on muzzle movement and recoil impulse. I should mention however that this is going to decrease the reliability of your rifle to an extent, so if this rifle is for home defense, zombies, etc you may want to think twice about installing an adjustable gas block or how far to tune the gas system.


    Free-floating Forend

    free floating forend


    Since looking cool is half the battle, free floating M-Lok or Keymod forends are the cat’s pajamas. Isn’t that reason enough to buy one? OK OK they do help in several ways as well. One of the benefits of free floating forends are that there’s now only one point of contact on your barrel. If you really want to miss your target, the best way to do that is to get that barrel warm and rest your gun on your A2 front sight post. Sarcasm aside, once installed you’re not going to sacrifice accuracy by resting your rifle off your free floating forend like you would be if you did the same with a standard handguard. Another big plus is the almost endless mounting solutions for lights, laser, or any other tacticool necessity.


    Trigger

    IMG_0236_opt


    If you could only afford to upgrade one part on your AR, swapping out the trigger would be my answer all day, every day and twice on Sunday. Yes if you’re a good shot, you should be able to pick up any gun and be able to hit targets with it, BUT who likes going to the range time after time with that long drawn out gritty stock AR trigger? If you answered “I Do” it’s because you’ve probably never shot a rifle sporting a trigger with a silky smooth pull and short reset. Your needs may vary and you might want a 2-stage trigger for precision over the short and light single stagers. If you do end up going with a low poundage trigger, double taps are your new best friend and your wallets worst enemy.


    Muzzle Brake/ Flash Hider

    lantac bmd


    If you’re unfamiliar with muzzle brakes and flash hiders, they’re like car mufflers in that they alter the exiting gasses to increase performance and are in a way personal preference. The question you have to ask yourself is whether or not you want to hide/ dissipate muzzle blast or harness it to reduce muzzle rise and felt recoil. If you want to hide it, then obviously a flash hider is the route for you. Yes your rifle probably came with an A2 birdcage flash hider on it but once you upgrade to something like a Battle Comp or Noveske Flaming Pig you’ll really notice the difference.

    When muzzle blast is the least of your worries and you’re less than considerate of the guy standing next you, then a brake needs to be on the end of your gun. Why? Well a brake, any quality one that is, directs those hot fast gasses out to the sides and out of the top of your muzzle. Sure it spews out a fiery concussive blast that’ll be felt all the way up in your nasal cavity but to make up for that you’re left with little to no felt recoil and even less muzzle movement. Is it worth it? Hell Ya!


    So what do I really think?

    Sure you could add a 5, 6, 7 to this list with stocks, charging handles and so on but at that point ever subsequent “must have part” becomes less and less important in the over performance of your rifle.  Now if you’ve decided to splurge and do all four upgrades to your AR, start with the trigger. Take it to the range, enjoy the heck out of it, then do the forend, gas block and muzzle device at the same time since you have to remove those parts anyway to change the block or forend.


    Still don’t know if these upgrades are right for your rifle? Post your questions in the comments below. As always guys, shoot em straight and be safe!


    15 Comments on 4 Must Have Upgrades for Your AR-15

    Read More
  • Personal Defense EDC (Every Day Carry)

    Apr 6 • News • 46374

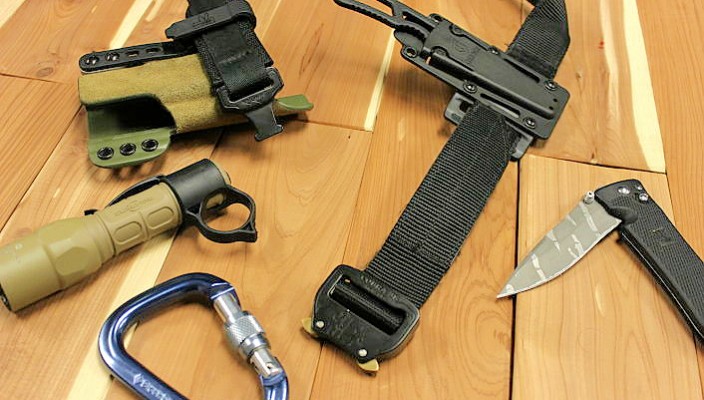
    In case you’ve yet to read some of my other posts, I’m a huge proponent of EDC, every day carry. This acronym is not to be confused with that other “EDC” where kids flock to the middle of nowhere to listen to techno music till their ears bleed. I digress. While some people that every day carry items choose to pick cool “gadgets” (there’s nothing wrong with that), I gravitate towards gear that has one purpose, to defend myself.

    Everyone’s needs vary based on their lifestyle and local laws but by and large, there’s some sort of self-defense gear that you can carry to protect yourself. So which gear is that?


    Solid Belt

    IMG_1370

    This may seem like a no-brainer but I tend to see way too many people that pay little attention to their belt. If you’re going to be carrying any weapon whether it be a knife, gun or both, your belt is essentially the thing that’s goings to keeping those weapons secure and where they need to be. Heck it’s the thing that holds your pants up and it’s hard to fight with your, as Brett Favre so famously said “pants on the ground”.

    So what makes a belt good?

    As I mentioned in my importance of a gun belt article, you want a belt that’s stiff. This is crucial when you start hanging knives and firearms off of it. The more predictable and repeatable you can make your draw, gun or knife, the better your chances are for success in a defensive situation and a stiff belt does that. I personally opt for a thick nylon gun belt with kydex inserts sewn in-between the layers like my EDC belt the Blade-Tech Instructors belt. Basically if you can hold a belt horizontally in its circular shape and for the most part the opposite end stays in the same imaginary horizontal axis, it passes the stiff test.

    Another equally critical feature is the buckle. You could have the stiffest belt imaginable but if it doesn’t stay cinched down to your desired tightness, the belt is No Bueno and a potential risk to you.  That’s why I opt for belts with uber strong “cobra” or “raptor” buckles.


    Holster

    IMG_1361


    This is one of those things that’s a big personal preference. However, as much as I love the smell of a fresh leather holster, over time a leather holster loses its rigidity. Since the number one job of any holster is to safely retain your firearm, one with flex is bad news. For that reason, a kydex holster built by a reputable company like Blade-Tech, Safariland, or a few others is definitely worth the modest price tag.


    Where to position the holster?

    I’m not even going to touch that topic because its debated more than 9mm vs. 45acp. However if you decide to carry, make sure you practice with it in that location. Heaven forbid you ever have to draw that pistol in a real life situation, the last thing you want is to fumble around with getting that gun out.


    Knife

    IMG_1364


    Your local laws will be the deciding factor in what size and style of knife you’re able to carry every day. If you’re able to walk around with a fixed blade, I’d say go with that over a folder. Not only is a fixed blade (*full tang) knife going to be stronger than a folding knife but the speed of deploying that weapon is considerably quicker too. Another selling point for me is that when you have a fixed blade in a sheath on your belt, the repeatability of drawing that knife is way higher than its folding cousin. Even with a firm pocket clip on a folder, that knife will have a tendency to move from its original spot, which isn’t good when you reach down to grab for it and it’s not there.


    IMG_1367

    If you’re not allowed to have a fixed blade, go with an assisted opening knife and if that’s not legal in your area then an unassisted folder that opens really quickly like this SOG Spec Elite, is a must. Something to keep in mind with knife selection is the blade shape. At the end of the day this is going to be a defensive knife so stick to either a Tanto, Spear Point, Drop point or Bowie blade designs as they are the best suited for self defense applications.


    Flashlight

    IMG_1368


    This is one of those things that you should bring with you literally EVERYWHERE. You have no excuse because to the best of my knowledge, there’s not a single law or location that prohibits flashlights. I never realized how invaluable a flashlight was until the power went out while I was in Walmart and used this very same light above to get out of the chaotic store. And while majority of phones have lights on them now, the last thing you want to do is drain the battery on your communication device by using the light.

    I’ve also found certain flashlights work well at causing very temporary blindness. Which is a great defensive tool if it’s the only thing you have on you. Personally I carry a Surefire G2X with a handy dandy Thyrm switchback attached which allows me to use this handheld light like a weapon light when used correctly.


    *Optional* (Carabiner)

    IMG_1369


    While I like to entertain ideas of fast roping out of a window with my riggers belt, some rope and carabiner, the reality is that’s not a reality for me. One thing that is strikingly possible is being forced in a situation that you have to fight your way out of. Although I won’t be needing a carabiner to fast rope out of a 20 story building, it makes a great impromptu handheld striking device. I don’t advocate using one for violence, sometimes violence is the only answer and when stored in your pocket and in the locked position, all you have to do is slide your hand through the middle and swing away. Not as much mass as brass knuckles but a carabiner is also 100% legal to carry anywhere. I will note that this is a last defense weapon if you don’t have any of the previously mentioned items on hand.


    Breaking it down

    It would be incredibly foolish to read this list of must have personal defense gear and think that by simply carrying all of this stuff and an abracadabra later that you’re the next Ethan Hunt. Yes these tools can make all the difference in a bad situation but only if they’re in the right hands.  So take some defensive classes and learn to master this gear.

    Lastly keep in mind whatever you decide to carry it’s got to meet or exceed its designed task first and foremost, looks should always be secondary in what you choose to carry with you day in and day out for self-defense.


    Still can’t make sense of self defense EDC gear? Post your questions below! As always guys, shoot em straight and be safe.


    8 Comments on Personal Defense EDC (Every Day Carry)

    Read More
  • Top AR Scopes For Every Budget

    Mar 30 • News • 157361


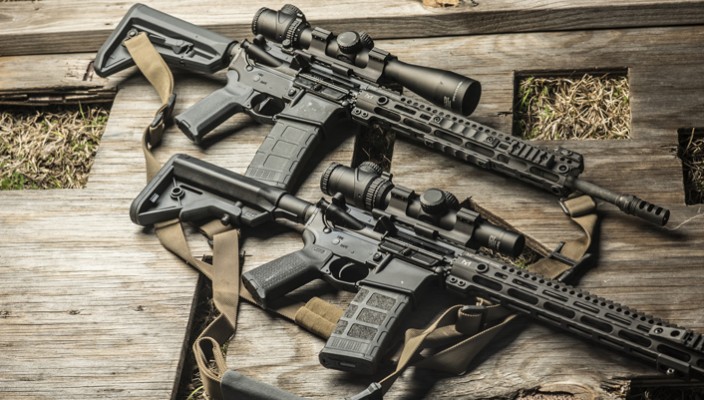
    Your aluminum and polymer Eugene Stoner amalgamation chambered in .223/5.56 aka the beloved AR-15, is an extremely capable platform. You name the application and you can bet there’s an AR sitting in someones safe built to excel at that specific function. It goes without saying, the key ingredient to accomplishing what you’re trying to do with your rifle is the optic you select to sit on that precisely spaced upper picatinny rail.


    Lately variable power rifle scopes in the 1-4/6/8X range have been all the rage and it’s easy to see why, they allow you to shoot targets up close quickly and push it out to 3,4,500 yards with the twist of the power ring. Because of their popularity, almost every manufacturer has their own dog in this 1-4/6/8X fight. While that’s all fine and dandy, the real question is, the question that plagues every gear purchase-which one is the best for the money?


    >$2,000


    US Optics SR-8C

    opplanet-u-s-optics-sr-8c-horus-vision-h50-ffp-illuminated-reticle-1-8x27mm-rifle-scope-sr-8c-h50-main

    Pro’s:

    -Awesome magnification range

    -FFP (First Focal Plane) allows for ranging and consistent reticle drop compensations based on any magnification level

    -Compact 12″ length

    -Extremely high build quality

    -Tough as nails

    -Impeccable clarity


    Con’s:

    -Weight. At almost 26 ounce before you clamp it on a mount, it’s a heifer.

    -The reticle. While I’m a fan of all of the various holdovers, the lower portion of the reticle is way too busy for my tastes.


    Kahles K16i 1-6X24

    opplanet-k16i-1-6x24mm-riflescope-10515-main

    Pro’s:

    -Very wide FOV (Field Of View)

    -Superior glass clarity

    -six power magnification

    -Illumination that can actually be seen in direct sunlight

    -G4B reticle results in quick target acquisition with a “no nonsense” approach

    -Durability

    -Integrated throw lever for fast magnification changes


    Con’s:

    -No auto off feature for illumination

    -No easy way to dial in an exact illumination level every time


    $1,000 – $1,500


    Leupold VX6 1-6X24 w/ CM-R2 Reticle

    opplanet-leupold-vx6-1-6x24-riflescope-02

    Pro’s:

    -Good clarity

    -Six power magnification

    -CM-R2 Reticle is very fast for engaging close up targets

    -Lightweight at only 14.6 ounces

    -Stupidly rugged


    Con’s

    -The push button illumination isn’t ideal


    Vortex Razor HD Gen II 1-6×24 w/ JM-1 Reticle

    IMG_3715_zpsc23e373b

    Pro’s:

    -One of the largest FOV’s on the market

    -In my opinion one of the quickest reticles for varied distance shooting

    -4″ of eye relief means you can move the scope farther up on the rifle

    -Generous eyebox allows you to get a good sight picture when your cheek weld is less than perfect

    -11 illumination settings with off positions in between each setting


    Con’s:

    -Weight. At 25ish ounces you can definitely feel the difference in balance with this scope mounted to your rifle.

    -Not offered in black anodizing


    $500-$1000


    Burris XTR II 1-5×24 w/ Ballistic 5.56 Reticle

    FastFire 1

    Pro’s:

    -Exposed turrets for quick and easy adjustments

    -11 illumination settings with off positions in between each setting

    -Illumination can be used in direct sunlight and still viewable

    -Reticle lends itself to quick close range target engagement

    -4″ of eye relief means you can move the scope farther up on the rifle

    -Affordable


    Con’s:

    -Exposed turrets have the potential to be knocked and result in your zero being lost

    -21 ounces without a mount


    Trijicon Accupoint TR24 1-4×24

    AccuPoint_AR5Q2079

    Pro’s:

    -Like an ACOG, it doesn’t require batteries to give you the illuminated reticle

    -Weight. At 14 ounces, its a featherweight.

    -Nice rubberized power ring

    -Good glass

    -Nearly as quick as a red dot sight


    Con’s:

    -Long in the tooth. While it’s an excellent scope it’s dying for an update. (Spoiler alert, Trijicon’s coming out with a TR25 soon at the same price point but with a 1-6x magnification range.)

    -No ballistic reticle so holdovers can be challenging


    <$300


    Bushnell AR Optics 1-4×24

    opplanet-bushnell-ar-optics1-4x24-r-s-ffp-illum-bdc-reticle-target-turrets-mtt-blk-ar91424i-main

    Pro’s:

    -Excellent value. For just a tick over $300, you get the scope and a mount.

    -Reticle is designed for quick close range engagement and has BDC holdovers

    -Integrated throw lever for power ring

    -17 ounce weight

    -Illuminated with 11 brightness settings


    Con’s:

    -Distortion around edges


    Vortex Crossfire II 1-4×24

    opplanet-vortex-crossfire-ii-1-4x24mm-riflescope-w-v-brite-reticle-black-cf2-31037-main

    Pro’s:

    -4″ of eye relief means you can move the scope farther up on the rifle

    -High value glass

    -Capped turrets


    Con’s:

    -Illuminated dot very hard to see in bright daylight conditions

    -Brightness knob is kind of big and gets in the way of you quickly turning the power ring


    Variable scopes are all the rage and for good reason, you can hit targets up close quickly like you’re using a red dot and then push it out to roughly 600 yards. Now that I’ve covered the entire gamut of what’s available based on your budget, I should mention that you get what you pay for with everything in life. With that being said, I’ve never heard of or personally had a poor thing to say about the scopes on the lower end of this list. So which one should you choose? My best advice would be to buy once, and cry once. Meaning if you know you’re going to get a lot use out of the scope, buy the nicest scope you can possibly afford and think of it as an investment into your future happiness.


    Still don’t know which one of these optics to throw on your AR? Post your question in the comments below! As always guys, shoot-em straight and be safe.


    9 Comments on Top AR Scopes For Every Budget

    Read More
  • Almost Everything You Ever Wanted to Know About Night Sights

    Mar 25 • News • 36380

    OK so lets say that tax refund money was just burning a hole in your pocket and HAD to click the “Make an Offer” button on an already sweet price on a Glock 19 at Buds Gun Shop. You pick it up at your FFL and polish that feed ramp by sending a few hundred round down range. Like 99.785% of Glock owners you’ll quickly realize the stock sights aren’t worth the twenty five cents in plastic they’re made of. And since the remaining money’s still burning another hole in your pocket, changing them out is the only sensible choice to make. But wow are there a lot of choices when it comes to sights, you’ve got TruGlo this and Tritium that, what’s a guy (or girl) supposed to use for a home defense gun?


    IMG_1335


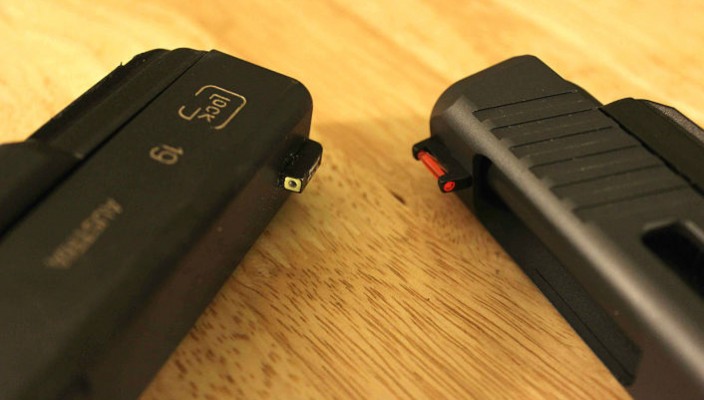
    If this sounds like a situation you’ve found yourself in, first off breathe because you’re not alone and secondly, night sights are the way to go for home defense/ CCW usage. I feel like I shouldn’t have to explain this but night sights get their name because they allow the user to engage targets in low light conditions, hence the “night.” The sights do this by using a material with a fancy name for glow in the dark, Tritium.

    Now pistol sight selection can be extremely user preference but professionals across the board believe in using a tritium/night front sight over the more common black or fiber optic sight is you’re going to be using the firearm for your everyday concealed carry or night stand gun. Why? In close up, quick pistol shooting the fastest way to accurately engage your target whatever it may be is by focusing on the front sight and placing it on the desired location of your target, aka front sight focus. If you were to do this in conditions where the lighting was less than ideal and had a fiber optic front sight or stock sights, it’s very difficult for your eye to pick up during duress.


    IMG_1336


    The radioactive isotope, tritium, found in night sights, constantly emit a glow. However similar to the glow in the dark planets stuck on your kid’s ceiling, once exposed to light it comes to life with an even brighter glow because of the photoluminescent paint outline on majority of the night sights on the market (shown above). What I personally like about the sights is this peace of mind that they’ll be undoubtedly ready for action should I need to use them at night.


    One dot, two dot, three dot?

    IMG_1320


    There are a ton of different choices when selecting the right night sights for your pistol, color, height etc. However one choice that is the most debated and as important if not the most is the style. You have a single dot where only the front sight is tritium and the rear sight is blacked out (my personal favorite). Next a two dot where you have a front tritium sight and a rear sight with a tritium line or dot in the center to line up the front and the rear sights. Lastly is your more tradition three dot where you have the front dot sight and a rear sight with two tritium dots. Which should you go with?

    The best way to demonstrate what style sights to get would be to have you perform a simple test. With an outstretched arm and your hand clenched with only your index finger showing, focus your eyes on the nail of that finger. Take that finger and point it at something across the room while still focusing your eyes on the nail. Pretty easy to keep that focus and put it on your target, right? Now with your other hand make a peace sign. Focus on that index finger nail again but this time bring your other hand in the shape of a piece sign into that same line of sight and keep the nails of these finger in line with the index finger nail of the other hand. You’ll notice that your eyes kind of bounce back and forth between your index finger nail and the nails of the peace sign hand. Now imagine doing this really quickly but with a firearm and potentially with your life on the line in the dark. It’s a lot for your eyes to take in and compute in a short period of time. For this reason alone I’m a huge fan of a front night sight and blacked out rear sight that doesn’t distract my focus from that very important front sight picture.


    IMG_1324


    Honestly I could talk for hours about low light/no light pistol shooting and why three dot sights are slower but I’ll save that for another time and maybe another post. What I do want you to leave this article with is this, go with night sights if there’s even a remote chance that you’re going to be running that pistol at night and secondly whatever night sight style you decide to go with, train with it.


    Need help finding the perfect night sights for your pistol? Let me know below! As always guys, shoot-em straight and be safe.


    15 Comments on Almost Everything You Ever Wanted to Know About Night Sights

    Read More
  • FLIR One Product Review- By Guest Author InnerBark Outdoors

    Mar 24 • Reviews • 12637

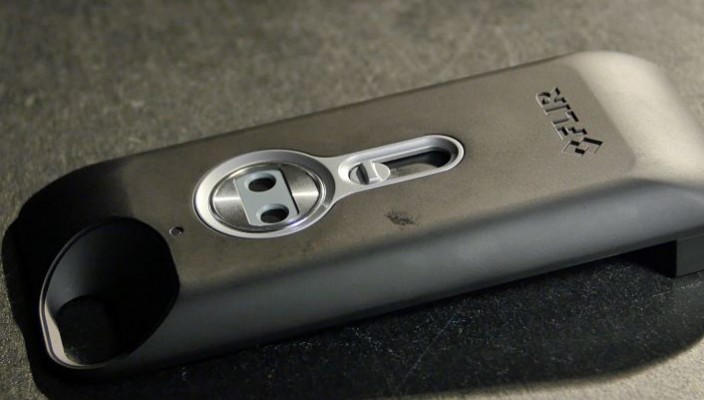
    How cool would it be if you could take real thermal images with an iPhone? I’m not talking about those cheesy effects in photobooth, but real Predator vision that can see heat “foot prints”, see cold spots in your home, and even see in total darkness. There’s an app for that… to be exact, there’s an app and a device for that. It’s called the FLIR One. It’s a device that attaches to your iPhone 5 or 5S, and turns your fruit ninja playing device into something more useful.

    flir 1

    flir 1

    flir2

    The part of the FLIR one system that houses visible light and thermal cameras, as well as the battery and other pieces of hardware.

    flir3

    flir4

    flir 7

    This is the headphone jack adapter, which allows you to plug in mic/button-enabled headsets. Depending on your type of headsets, this might not be necessary.

    flir 8

    flir charge

    Charging of the FLIR One device is done with a Micro USB cord. Once the FLIR One is fully charged, the unit will then begin topping off your iPhone.

    flir 10

    flir 11

    The connecting interface begins with the supplied phone housing. It goes on like a normal phone case. Notice the hole where the apple logo is, as this locks into the mount on the FLIR device.

    flir5

    The FLIR One plugs right into the iPhone when the case is locked into the mount.

    flir 13

    To start using the device, you’ll need to download the free app on the Apple App Store. There are several apps that FLIR has designed for use with the FLIR One, but the basic one is all that is needed in order to view live thermal images, as well as take photos and videos in IR.

    flir 14

    Running the App is simplistic. It walks you through instructions the first time you use it but in the spirit of education, lets run through the basics.

    flir 6

    Tapping on the settings buttons reveals a few icons. (Left to right) Spot Meter, Light, Advanced Settings and Battery Life.

    flir6

    The advanced settings lets you set emissivity (type of surface you are reading such as smooth like glass, or matte/dull), save your GPS coordinates, save the photos you take right in you iPhone photo gallery (all photos are saved in your app’s memory cache in either case), and change your temp units from Metric to ‘Murica.

    flir 17

    flir7

    The light on helps the visible light camera to pick up line details, so that you can easily tell exactly what’s what in low light.

    flir 8

    The Spot Meter lets you measure temperatures without making physical contact. As you can see in this image, my niece is sporting a mean temperature. She was not faking it to get out of school that day.

    flir9

    The app will let you know when you need to calibrate the device in order to get the most accurate readings. The process takes a few seconds, and is easily done with tactile feel. Not calibrating the FLIR when prompted to still means you can see temperature variances, but the Spot Meter will not run without calibration.

    flir 21

    The upper right icon lets you sift through 9 different image profiles. Once you take a photo, you can later change that color profile as well (changing color profiles is not available for videos after the fact).

    flir10

    Here’s the exact same image in all 9 of the color profiles so you can choose the flavor of the day.

    So what do I think of the FLIR One?

    So far, I love it. It’s something I can pull out when I’m in the field to get extra info on the scene we are investigating, or around the house when checking on potential water problems.  It’s a bit bulky, but fits nicely in my backpack next to other gear. My only complaint is that it’s so far only available for the iPhone 5 and 5S, which is about 175$ when I bought it, so it’d be nice to have a regular iPod option, and wish maybe there was a good screen protector. Bottom line, is that the FLIR One makes it possible to own an infrared device which is great for work, and a good amount of fun outside of work.

    4 Comments on FLIR One Product Review- By Guest Author InnerBark Outdoors

    Read More