• Trijicon RMR

    Trijicon RMR-Miracle Micro Reflex Sight

    May 30 • News • 10642

    Its a fact,  your eyes will have a harder time picking up your iron sights the older you get. With the addition of some of the latest illuminated sights that you can throw on your favorite rifle or shotgun, you’ll have no problem hitting your mark no matter how bad your eyes get. Unfortunately in the past  very few of these sights could be used effectively on a handgun. However times have changed, and the use of red dots on pistols has exploded on the market, with nearly every firearms publication showcasing a pistol with one atop. The number one miniature red dot that has been gracing the pages of these magazines is the Trijicon RMR.

    Trijicon RMR

    Trijicon RMR

    Stemming from a background of building the best rifle scopes on the face of the earth, Trijicon is no rookie when it comes to developing an optic for your gun. RMR stands for ruggedized miniature reflex sight ,which in your mind should mean “hey I can beat the heck out of this red dot sight, plus its small so I can put it on anything.” In all honesty, I would tell you that you’re right. This sight was designed for hard use. Although the RMR is a beautiful piece of technology, the housing serves one purpose and that’s function.

    Some of you may be thinking, “why would I mount this red dot on my pistol?” Let me break it down for you why red dots on pistols are extremely practical. Like I noted earlier, as your eyes get older it becomes harder to line up those iron sights. The RMR allows you to naturally point your pistol at the target and quickly pick up the red dot. This may not seem like a big deal, but being a seasoned shooter I noticed how much faster it is to draw and pop off a shot with the RMR  on my pistol as opposed to traditional iron sights.

    Trijicon RMR

    Trijicon RMR

    What sets the RMR apart from the rest of the sights out there is the “ruggedized” part of its name. The 7075-T6 aluminum housing allows the shooter to perform one handed malfunction drills. Basically this means the sight is strong enough for you to rack the slide of your gun off your belt or a firm edge. This may not seem of high importance to you but when the stuff hits the fan you may not have the use of both hands and might have to rack the slide singlehandedly.

    If the aging eyes or the bulletproof construction haven’t won you over than maybe the 4 year battery life will be the deciding factor. Yes you heard me correctly, 4 YEARS! If that doesn’t get you excited about this miniature red dot then I don’t know what will. With a crazy long battery life and a housing that will probably last an eternity, there’s no reason a Trijicon RMR shouldn’t be your next purchase. If you guys have more questions about the RMR, feel free to leave them in the box below.


    No Comments on Trijicon RMR-Miracle Micro Reflex Sight

    Read More
  • 3-Gun Competitor Brian Williamson’s Review of the Vortex Razor HD Scope

    May 29 • News • 18368

    As a sponsor of the Superstition Mystery Mountain 3 Gun Competition back in March, OpticsPlanet was allotted a shooting slot for the match. As much as we love to shoot these matches ourselves, we decided to instead offer the slot to local 3-gunner Brian Williamson. And to sweeten the pot even more, we worked with our friends at Vortex Optics to supply Brian with an excellent new optic for the event.

    Here’s what  Brian had to say about his time at the Superstition Mystery Mountain 3 Gun Competition, as well as the Vortex Razor he ran:


    I’ve used many brands of scopes in competition, including Trijicon Acogs, Burris 1.5-6, EOTECH and most recently a Swarovski Z6I.  I had been researching 1-6 power scopes when OpticsPlanet, along with Vortex, offered to sponsor me at the Superstition Mystery Mountain 3 Gun, and were gracious enough to send me the Vortex Razor HD Gen II with the JM-1 BDC reticle to set up and put thru the wringer at the match.   The field of view and eye relief are unbelievable on the Razor HD Gen II– with virtually zero lost “vision” around the edges of the scope.

    On 6x power, the field of view is huge and better than most high end scopes I have used.  The Razor’s illuminated dot is just as bright as my Swarovski and not just daylight “visible”, but daylight “bright as hell” visible. One more thing to mention is the outstanding battery life the scope has. I have on several occasions left the dot on overnight and came to a stage the next day and it was still as bright as I left it the day before. I personally like the Razor’s smaller dot size as it lends itself to slightly more precise shooting when using the dot.  The glass in the Razor is really good.  As much as it pains me to say it and I really do love my Swarovski, the new Razor has glass that is every bit as good as my $2400 Swarovski Z6I – maybe not better, but certainly just as good.

    Brian Williamson (left) & Kalani Laker (right)

    OpticsPlanet Represented Well At Superstition Mountain Mystery 3 Gun

    I also really like the Razor’s super low cap 50 moa turrets and the “lockable” illumination feature.  In my opinion, this is one of the scope’s best features – no tools or pennies needed. Never again will I be mad when at the range sighting my rifle and realize I left my readers at home. Even these old guy eyes can easily see the numbers on the turrets.

    With the great eye relief and clarity, acquiring and taking distance shots is easy.  The reticle is easy to decipher and I am able to get my shots off quickly and accurately. This scope has taken my long distance shooting at major and local matches to another level.

    GearExpert And Vortex Team Up

    GearExpert Really Tests The Gear!


    I have used this scope in two major 3gun matches and several local matches and it has survived countless barrel dumps, banging on walls, in and out of the truck along with riding in the back on the truck in a soft canvas case on trips. I never have to worry about my zero point as it stays spot on all the time no matter what I do to this scope.  Along with such durability comes a slight bit extra weight, but really you never notice it after the clock goes off and you are in the heat of the battle on a 3 gun stage!

    All Smiles With the Help Of Vortex

    Brian Williamson

    Shooting in the Open Division, I run a red dot scope for the closer targets in addition to the long range scope.  With the Vortex, I found myself just using it exclusively due to its ease of adjustment and acquisition of the targets. The reticle is just the right size and lends itself for super-fast target to target acquisition when on 1x power and quick adjustment to 6x power when shooting long range targets.

    The scope is built like a tank and no worries if you do have a problem, because Vortex has one of best warranties in the business and its customer service is great! I don’t think you could hurt this scope unless you drop it out of a truck or beat it with a hammer.  The Razor HD Gen II 1-6×24 smokes my other scopes, and at a price point of almost $1K less. I will be fitting the rest of my rifles with the Razor HD Gen II very soon!!

    No Comments on 3-Gun Competitor Brian Williamson’s Review of the Vortex Razor HD Scope

    Read More
  • Home Defense Shotgun on A Budget

    May 21 • News • 72169

    Being the “gun guy” in your family and group of friends has it privileges. One of the many great things is that you can directly affect the safety and well being of the people you care about. However what I hate most is constantly dispelling gun myths and legends. I think one of the most popular questions is “what is the best gun for ….”. To be honest the best gun for anything is A. the one that you can afford to shoot a lot and train with  and B. the gun that you shoot the best with. Since there’s no shortage of expensive guns that would take me a whole year to save up for, I thought I could bring to light one of the most effective and affordable guns money can buy.

    Home Defense on A Budget

    Home Defense Shotgun on A Budget

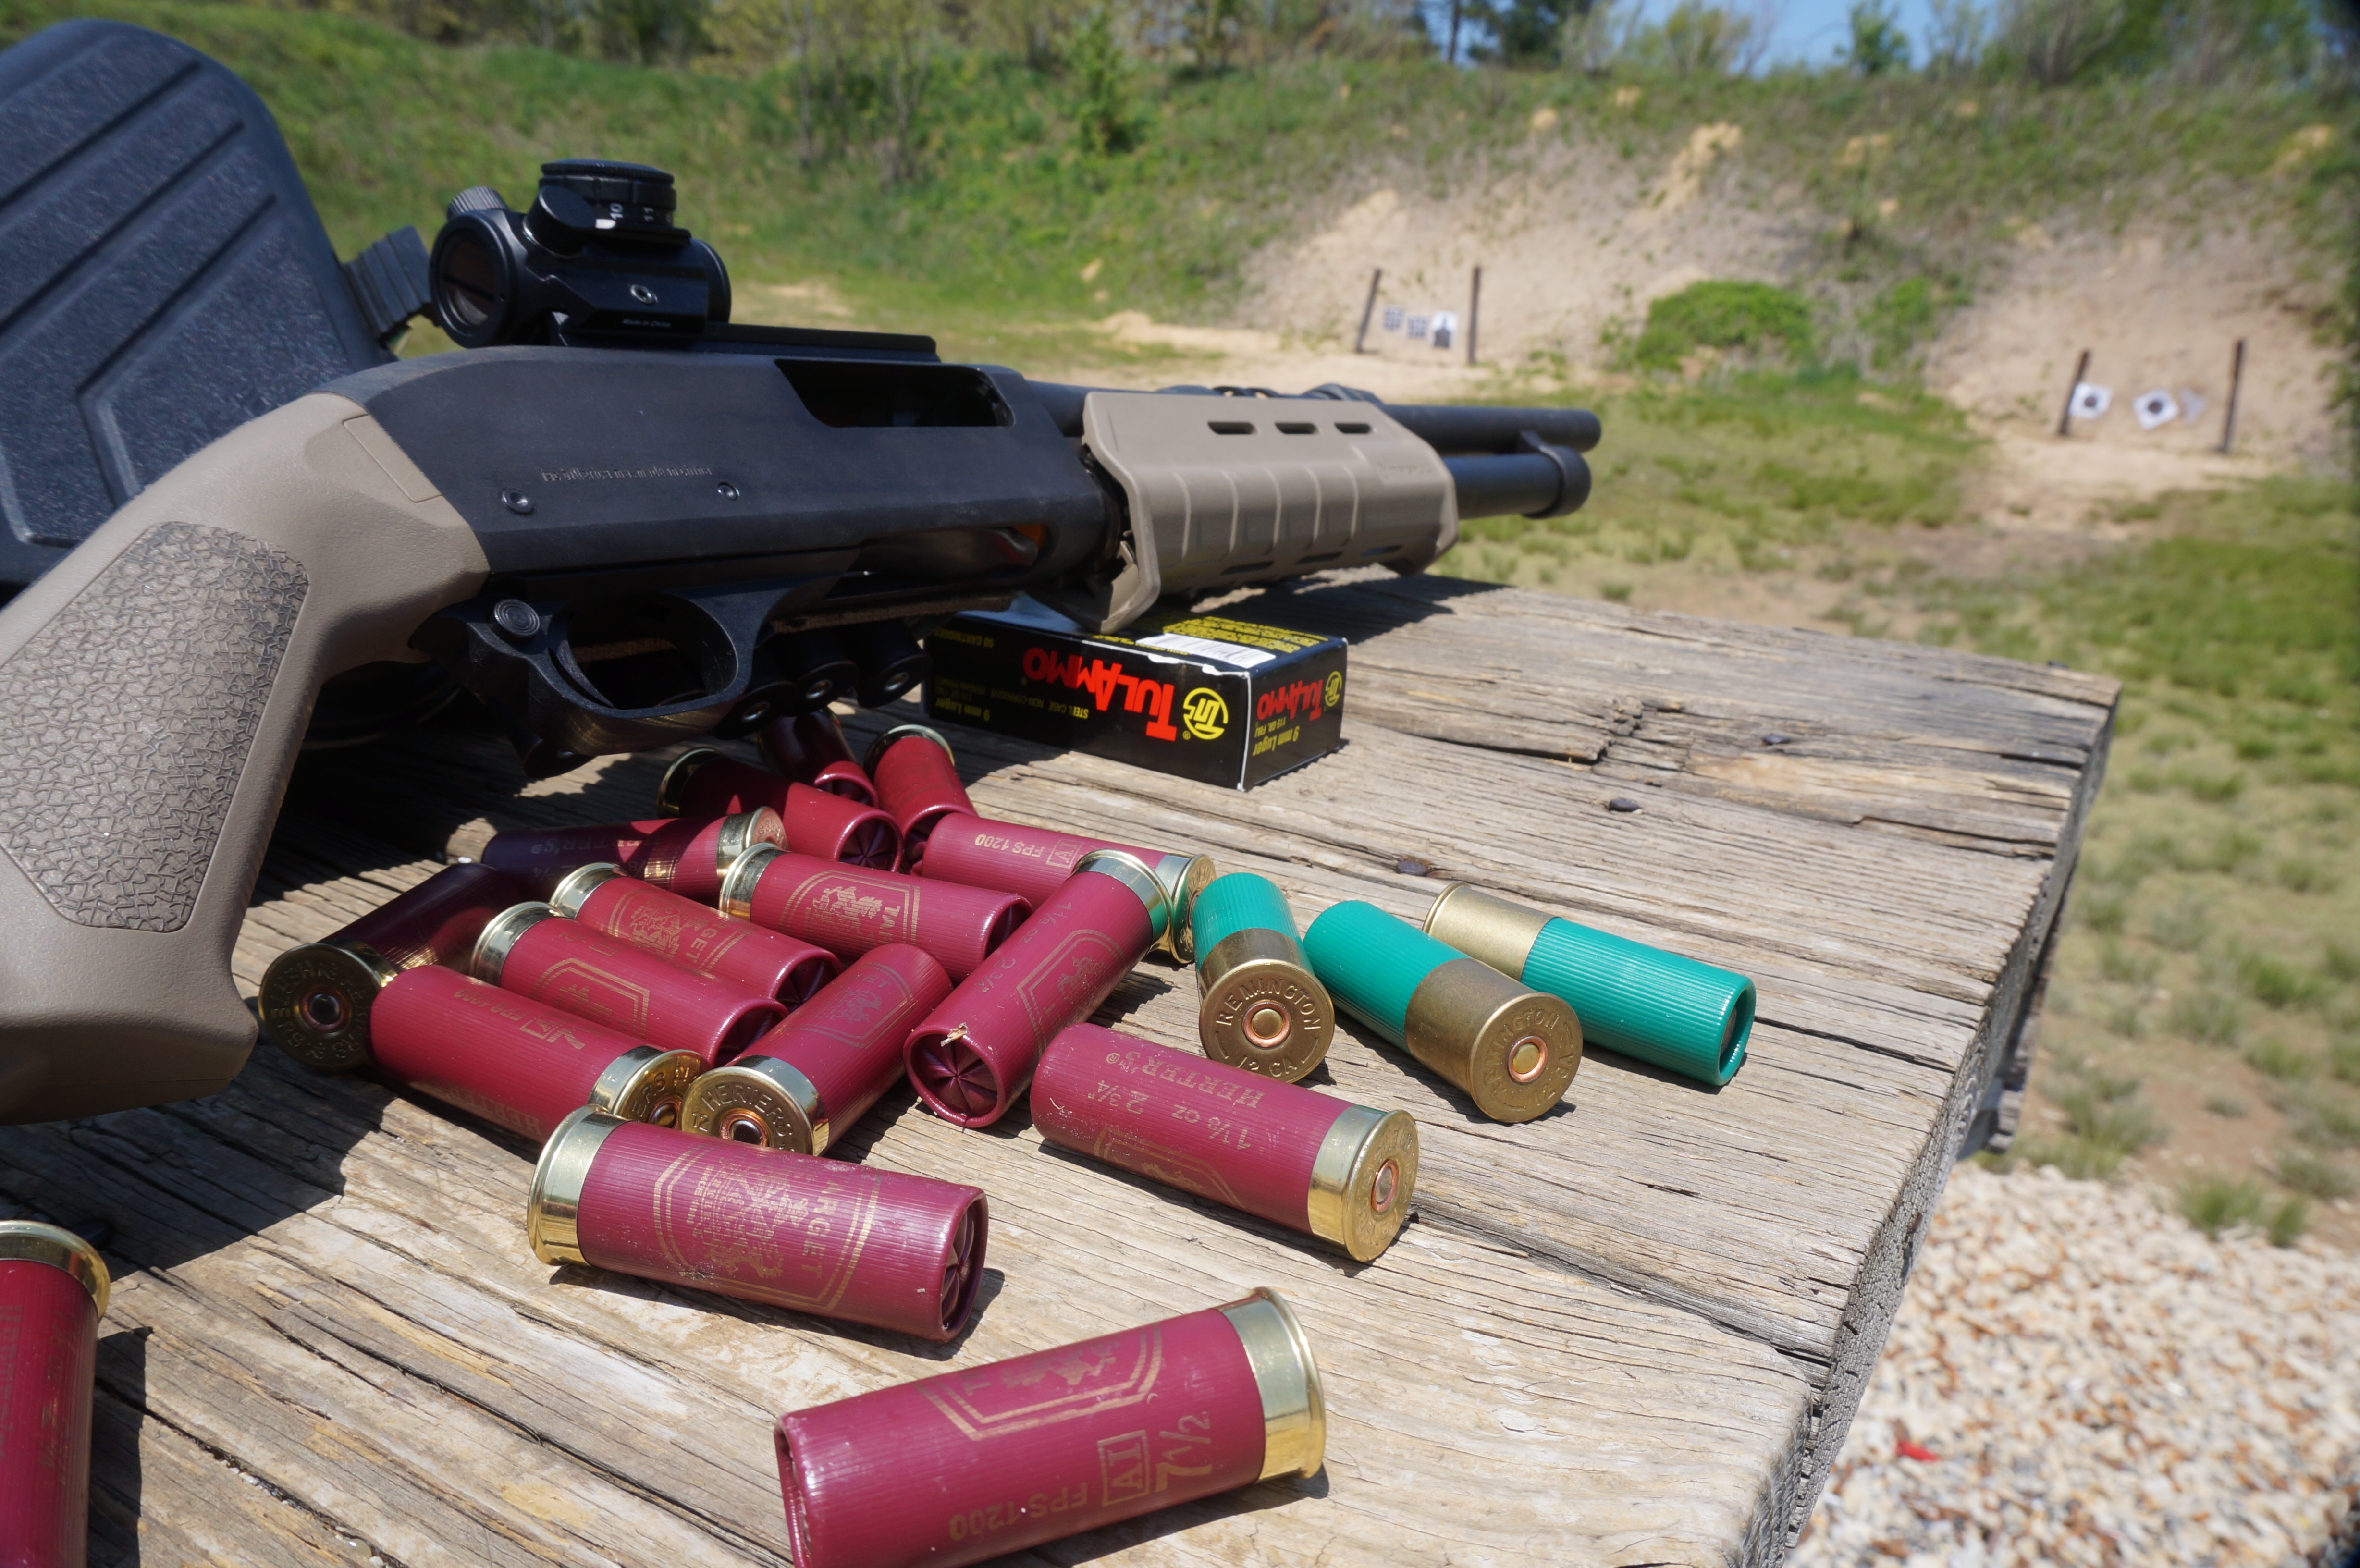
    I’m sure you’ve guessed by now that this isn’t a post about a Hi-Point and quite frankly that gun is nothing more than a paper weight. The gun that I’d like you folks to take a look at is the IAC Hawk 981R 12 gauge pump shotgun. Yes it’s a clone of the Remington 870 and yes it’s made in China. If you put that aside what you have is a 12 gauge that is half the price of an 870 and accepts all of the same parts used to trick out an 870. This cheapskate comes with an 18.5 inch barrel and a capacity of 5+1 when using 2-3/4 shells. Based on all of the rave reviews of this shotgun, the $189 price tag was a no brainer.

    Home Defense on A Budget

    Home Defense Shotgun on A Budget

    I don’t think I was ever so excited to get a Chinese knock-off  anything, but for some reason I was as giddy as a school girl when picking this gun up at my local FFL (Federal Firearms License). What you get is a bare bones, no frills pump shotgun with a Picatinny rail atop for mounting optics. The pictures you see above are NOT how the shotgun comes out of the box. Since it was literally half the price of a Remington 870, I knew I had some room in my budget for “improvements”.

    Magpul SGA Stock

    Magpul SGA Stock

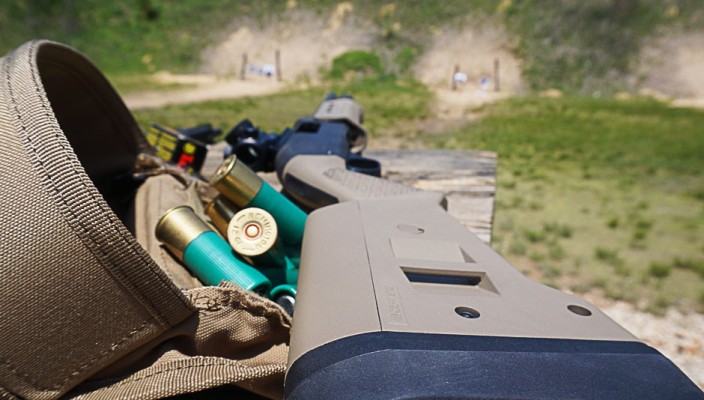
    If you’re serious about shooting this shotgun a lot, then the first two things that need to be swapped out are the stock and forend. I’ll be honest with you guys, the stock and forend that came with it are “OK” at best. I wanted something that felt good in the hand and allowed me to operate the gun more effectively. The Magpul SGA stock and MOE forend for the Remington 870 fit this knock-off perfectly. The Magpul SGA stock is strange looking compared to the stocks that we’re used to, it’s like a hybrid of a pistol grip and traditional shoulder stock. With a super comfortable rubber recoil pad, adjustable length of pull and cheek riser, standard sling attachment points, and the option for quick-detach mounts, what more could you ask for?

    Magpul MOE Forend

    Magpul MOE Forend

    The number one way to have a malfunction with a pump action shotgun is “short-stroking” or when the shooter doesn’t bring the forend all the way back before racking it back into battery, which results in a shell not being loaded. What this means when your life is on the line and you fire off that first nervous shot , rack the pump back to load another round into the chamber, slide the forend forward, pull the trigger and nothing happens. This will not only leave you looking like a fool but will also allow the bad guy to get a shot in. The best way to fix the probability of that happening are to make sure you ram that pump all the way back every time. The Magpul MOE forend allows you too get an extremely positive grip and rack the hell out of the pump without worrying about your hand slipping off or short-stroking.

    Home Defense on A Budget Light

    Home Defense Shotgun on A Budget Light

    Since a majority of home invasions happen at night, a weapon mounted light is a necessity. I had to have a lot of different features out of a light for this shotgun: it needed to be lightweight, had to be able to withstand the violent recoil of a 12 gauge,  needed to work in a wide range of temperatures, had to run for at least 2 hours on high, and  most of all had to be high value. The Surefire G2X Pro not only does all of those things but leaves me only $60 poorer. I am by no means stuck on brand names, if I could have found a better light for cheaper I would’ve been all over it but let’s face the facts, this is the best flashlight for the money period. Mounted up using Magpul’s light mount kit, the light is right where I need it during any number of weapon manipulations.

    Bushnell TRS-25

    Bushnell TRS-25

    If you’re using this shotgun only for home defense, you can stop right here and you’ll have yourself an $384 weapon system that’ll stop everything from a hoard of zombies to the thief that picked the wrong house to break into. But if you want to add a little more capability to the shotgun for activities such as shooting slugs, then you’ve got to throw a red dot sight on there. I decided to slap a Bushnell TRS-25 onto this gun’s standard Picatinny rail and after dialing it in, lets just say Daniel Boone has some competition. While only setting you back just shy of a Benjamin, this red dot is bombproof and allows you to shoot with both eyes open, accurately.

    Like I said earlier, the best gun is the one that you can afford to shoot a lot and the one that you can actually shoot well. As a grown male and flirting with the 6 foot mark, I am able to comfortably shoot a 12 gauge shotgun. Depending on your size and preferences, there might be a different home defense setup that works for you. Regardless, the most important thing to remember is that you need to train, train, and train some more. What’s great about the IAC Hawk is that it’s so cheap that  you can use the additional $500 you would’ve spent on an AR-15 for ammo.

    What do you think about the IAC Hawk 981R 12 gauge and the accessories I’ve added to it? Let me know in the comment box below. As always guys, shoot em straight and be safe!


    27 Comments on Home Defense Shotgun on A Budget

    Read More
  • How to Acid Etch your Knife or Multi-Tool

    May 9 • How-To • 49082

    Tired of the same old look of your favorite knife? Wouldn’t it be nice to add some flash to your blade? Sure you could have it engraved but that’s really expensive. You could also try your hand at engraving but one false move will turn your favorite blade into trash. Acid etching gives your favorite blade or multi-tool a custom look without the hefty price tag and the high probability of screwing up.
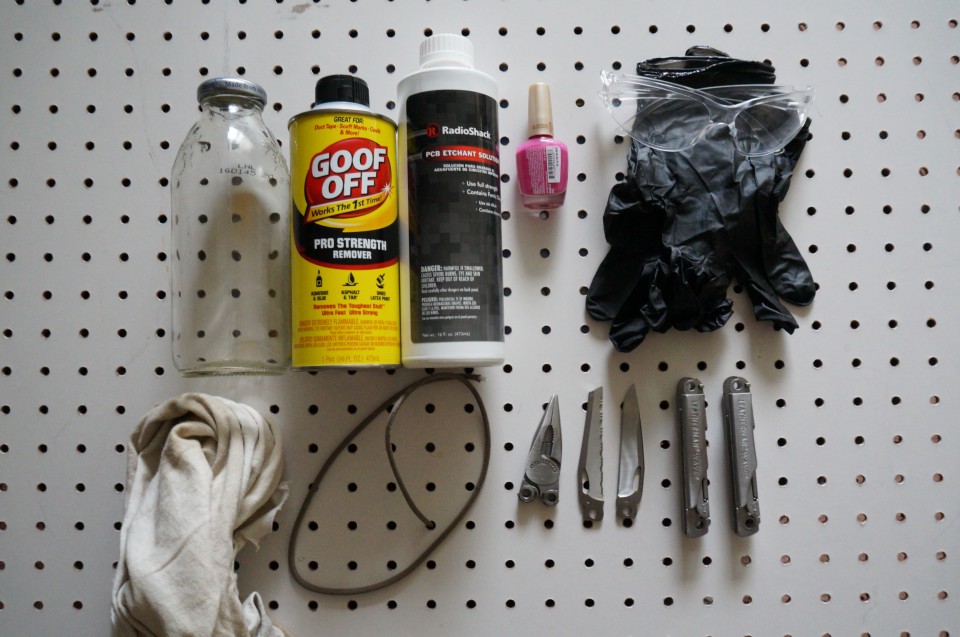
    What you need to Acid Etch

    What you need to Acid Etch

    What you need to get started: One of the nicest things about acid etching is you don’t have to search all over the internet for  special tools or materials in order to get the job done. The main component for  this customization can be found at pretty much any RadioShack location and everything else you’ll probably already have.


    List of items you’ll need:

    -PCB Etching Solution (Found at RadioShack)

    -Glass Jar with lid (I used an empty Snapple bottle)

    -Goof Off or Nail Polish Remover

    -Nail Polish

    -String or Wire (Paracord works well)

    -Rags

    -Latex Gloves

    -Eye protection

    -The knife or multi-tool you’re going to be etching


    Let the fun begin!


     1. Disassembly and Prep.- The first thing you’re going to need to do is take off the handles from the knife or completely dismantle the multi-tool if that’s what you’ll be etching. Why do you need to do this? You’re going to be dunking this knife or multi-tool into a container of acid and acid just so happens to eat away at material, go figure. Unless you want to damage your fancy G-10  scales, take the extra minute or two and remove them. What you’re also going to need to do is take some of the nail polish remover or goof off  and wipe down the pieces that you will be etching. Doing this will help the acid etch the metal evenly and ultimately give you the best results.

    2. Safety and Let the Acid Flow- I’m a firm believer of protecting your eyes and when you’re dealing with acid, you’d be an idiot to not wear safety glasses. I highly recommend wearing latex gloves as well because the last thing you want after creating a little bit of art, is a nasty rash from getting this stuff on your hands.  I also recommend moving to a well ventilated area to avoid the fumes. Next open up the PCB solution and fill up the Snapple container to about three quarters of the way.
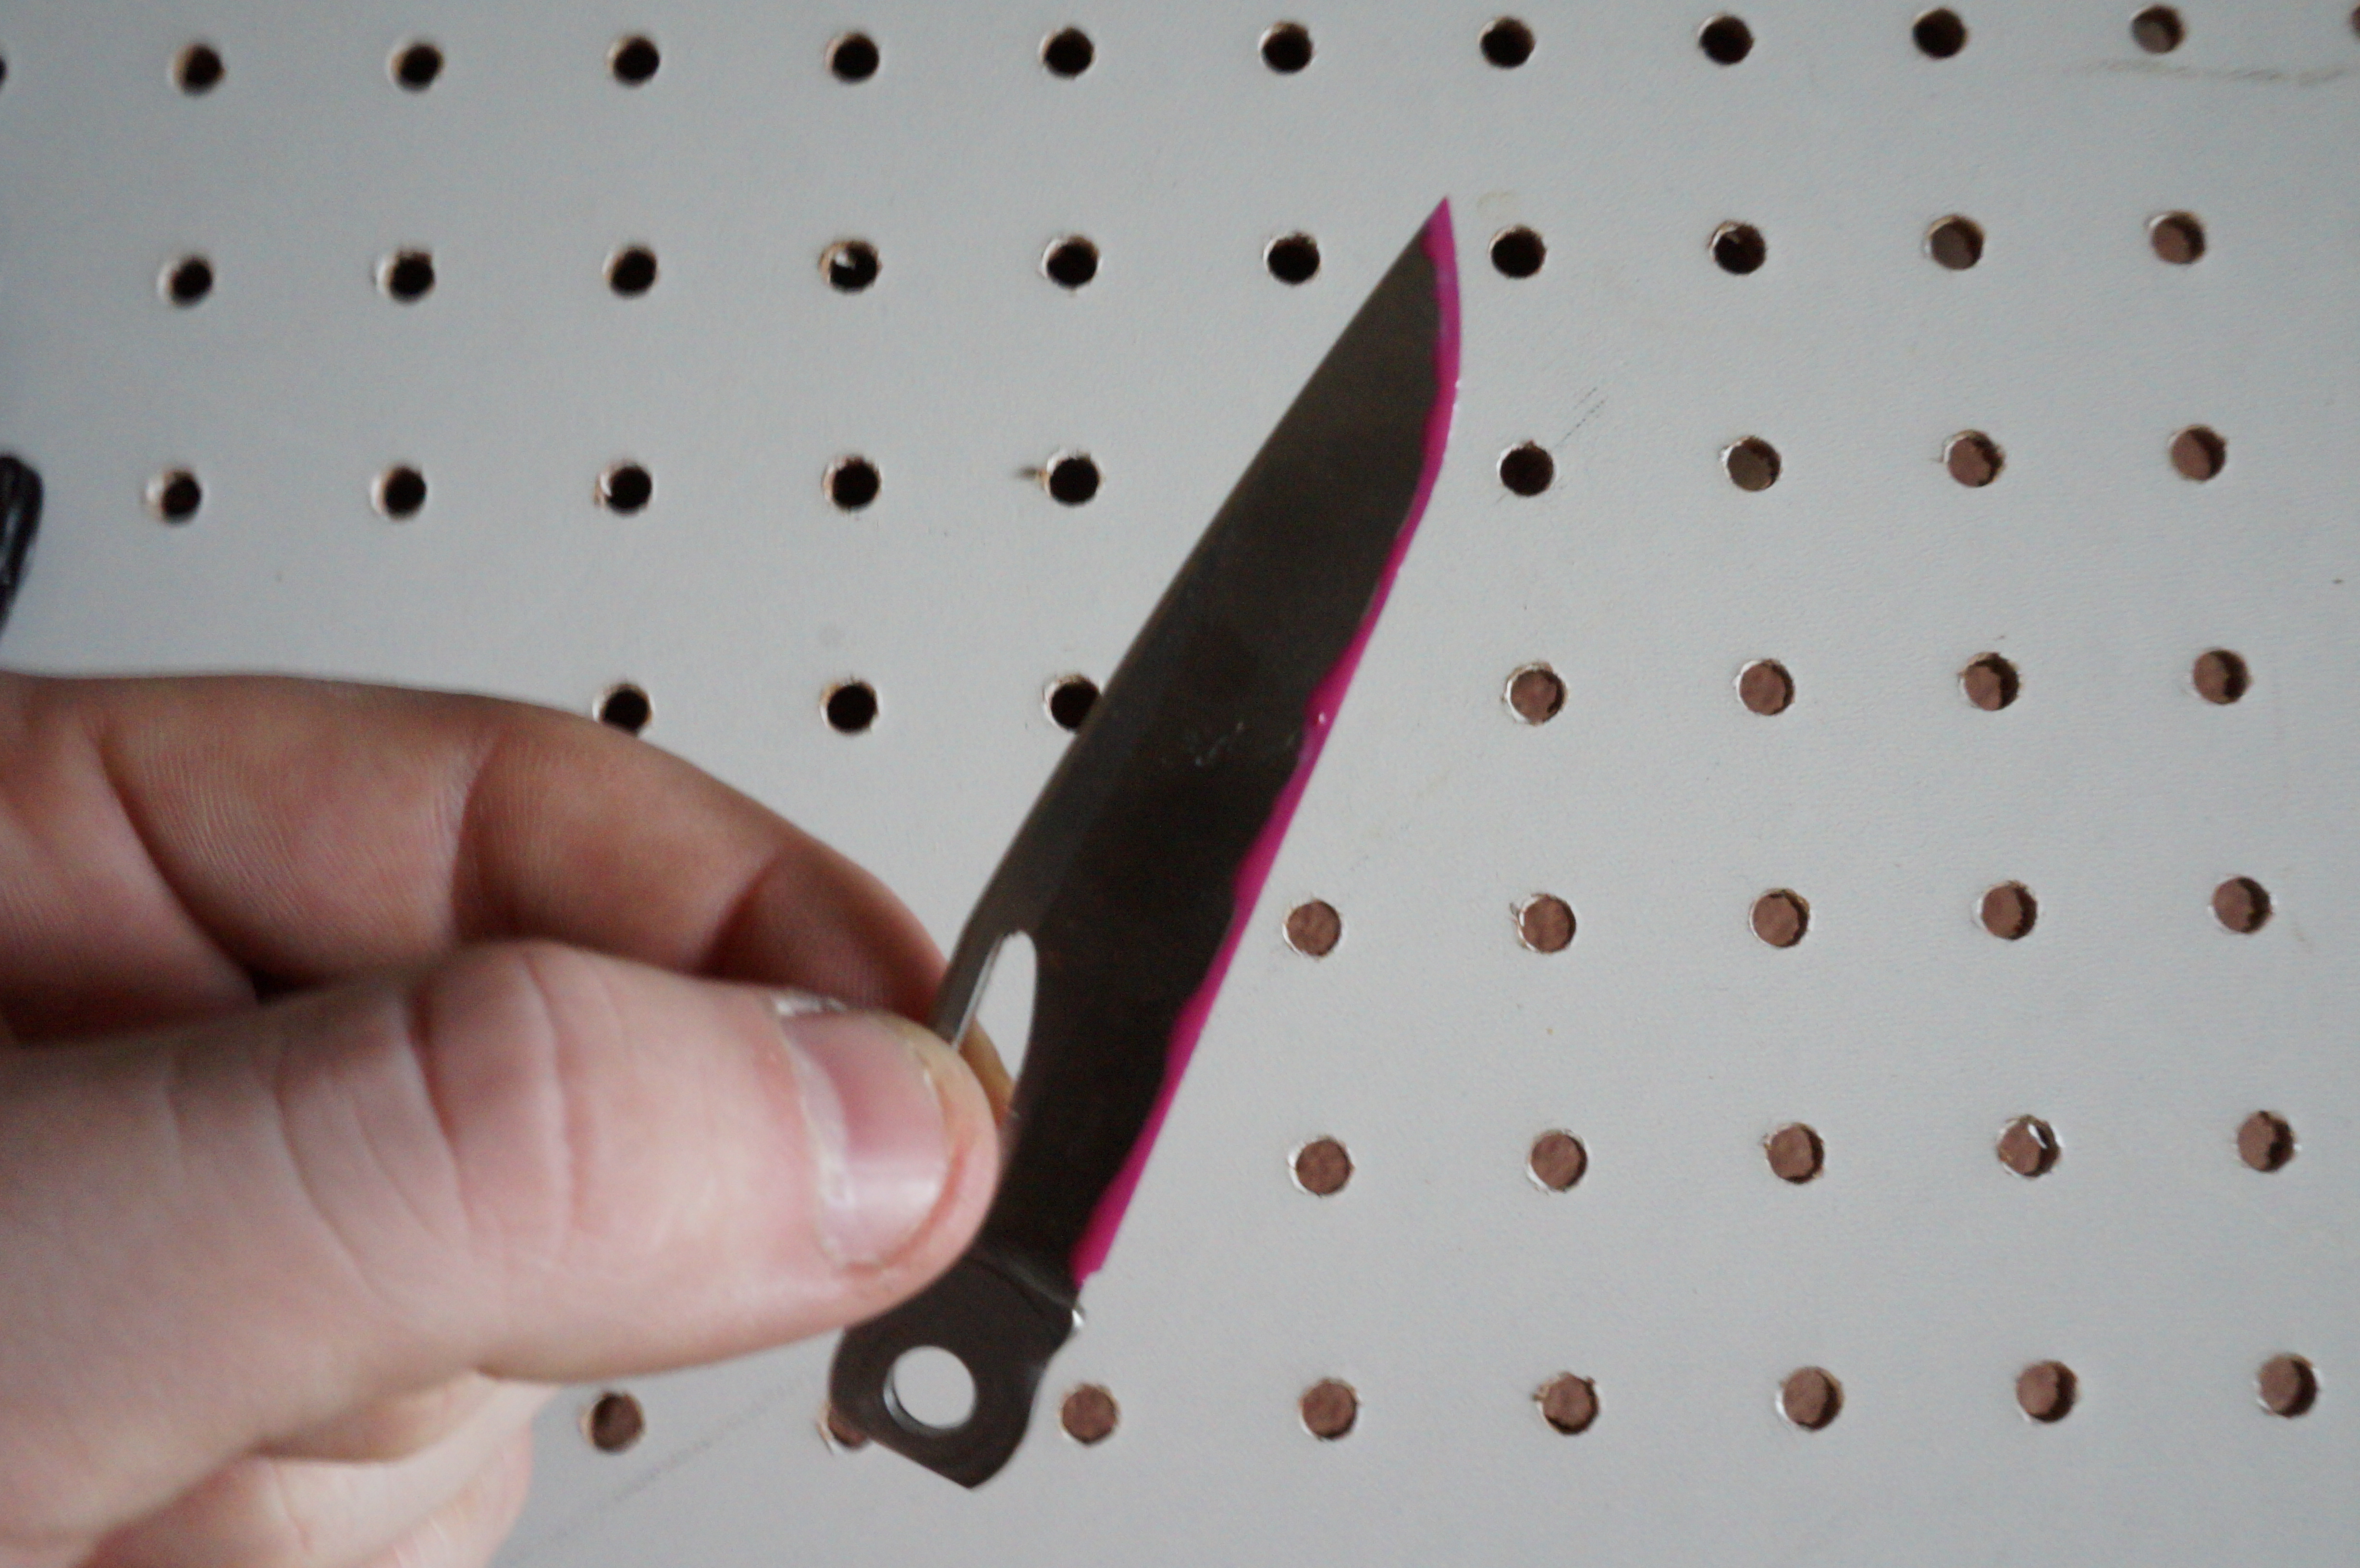
    Painting the Edge

    Painting the Edge

    3. It’s Time to Paint–  Push your manhood to the side for a moment and utilize the protection that nail polish offers. The first step is to make sure you paint the actual edge of the blade. Because of the strength of this PCB solution, it can ruin that edge that takes many of us so long to perfect with sharpening. I advise that you put a generous coating of paint to the edge so you have nothing to worry about when it is all said and done.
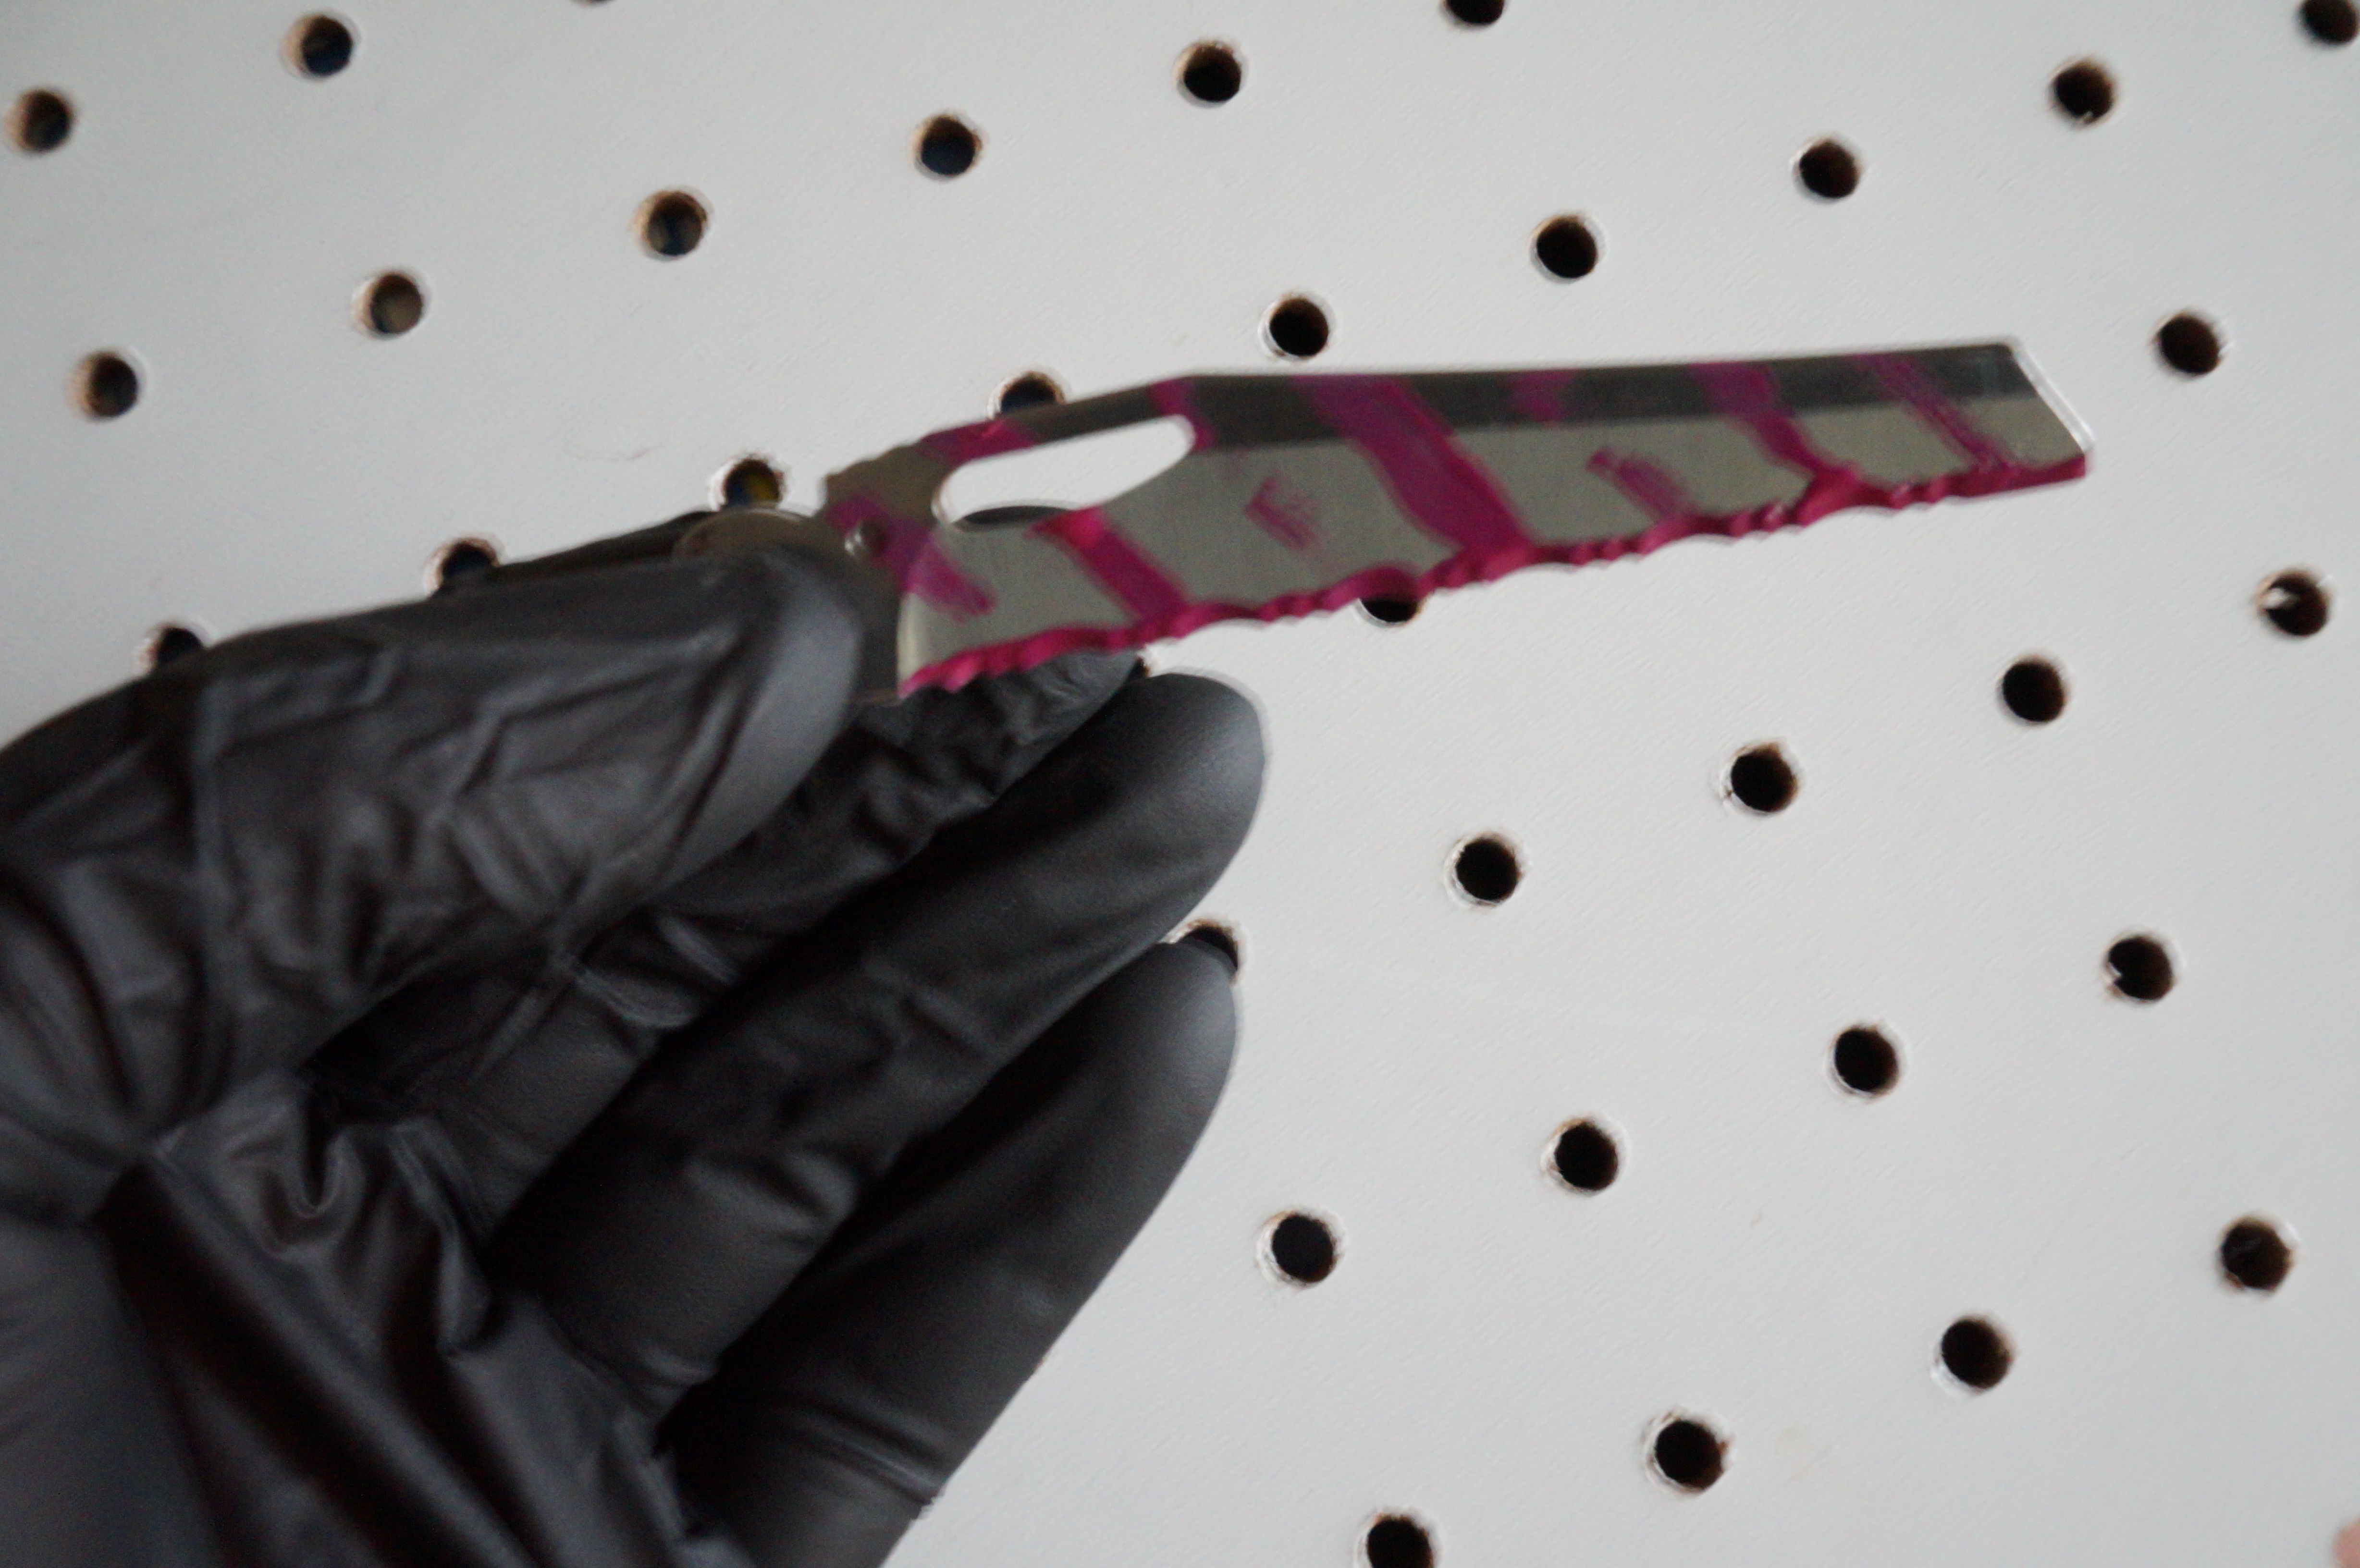
    Painting the Blade

    Painting the Blade

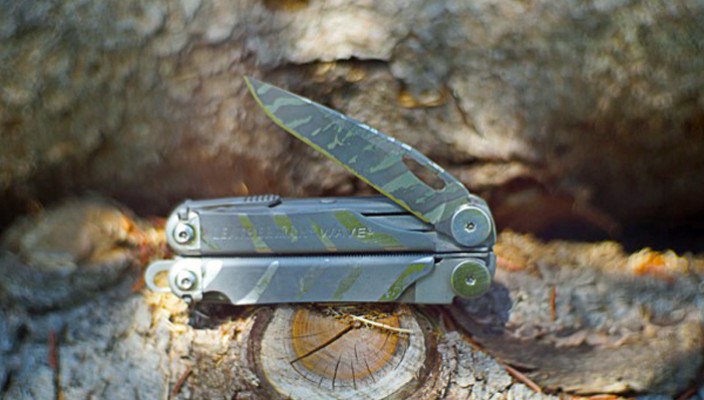
    Now it’s time for you to dig down deep and release that inner Picasso in you.  Keep in mind the acid will change the color of the exposed metal, so wherever you apply paint will remain the original tone of the blade. The sky’s the limit as far as the design that you come up with for your blade or multi-tool. I opted for a tiger stripe look because of the simplicity and ease of demonstration. I found that a toothpick for a brush works extremely well in creating those thin lines that you can’t reproduce with the nail polish brush. Allow at least 25 minutes for the paint to dry before moving on to the next step.
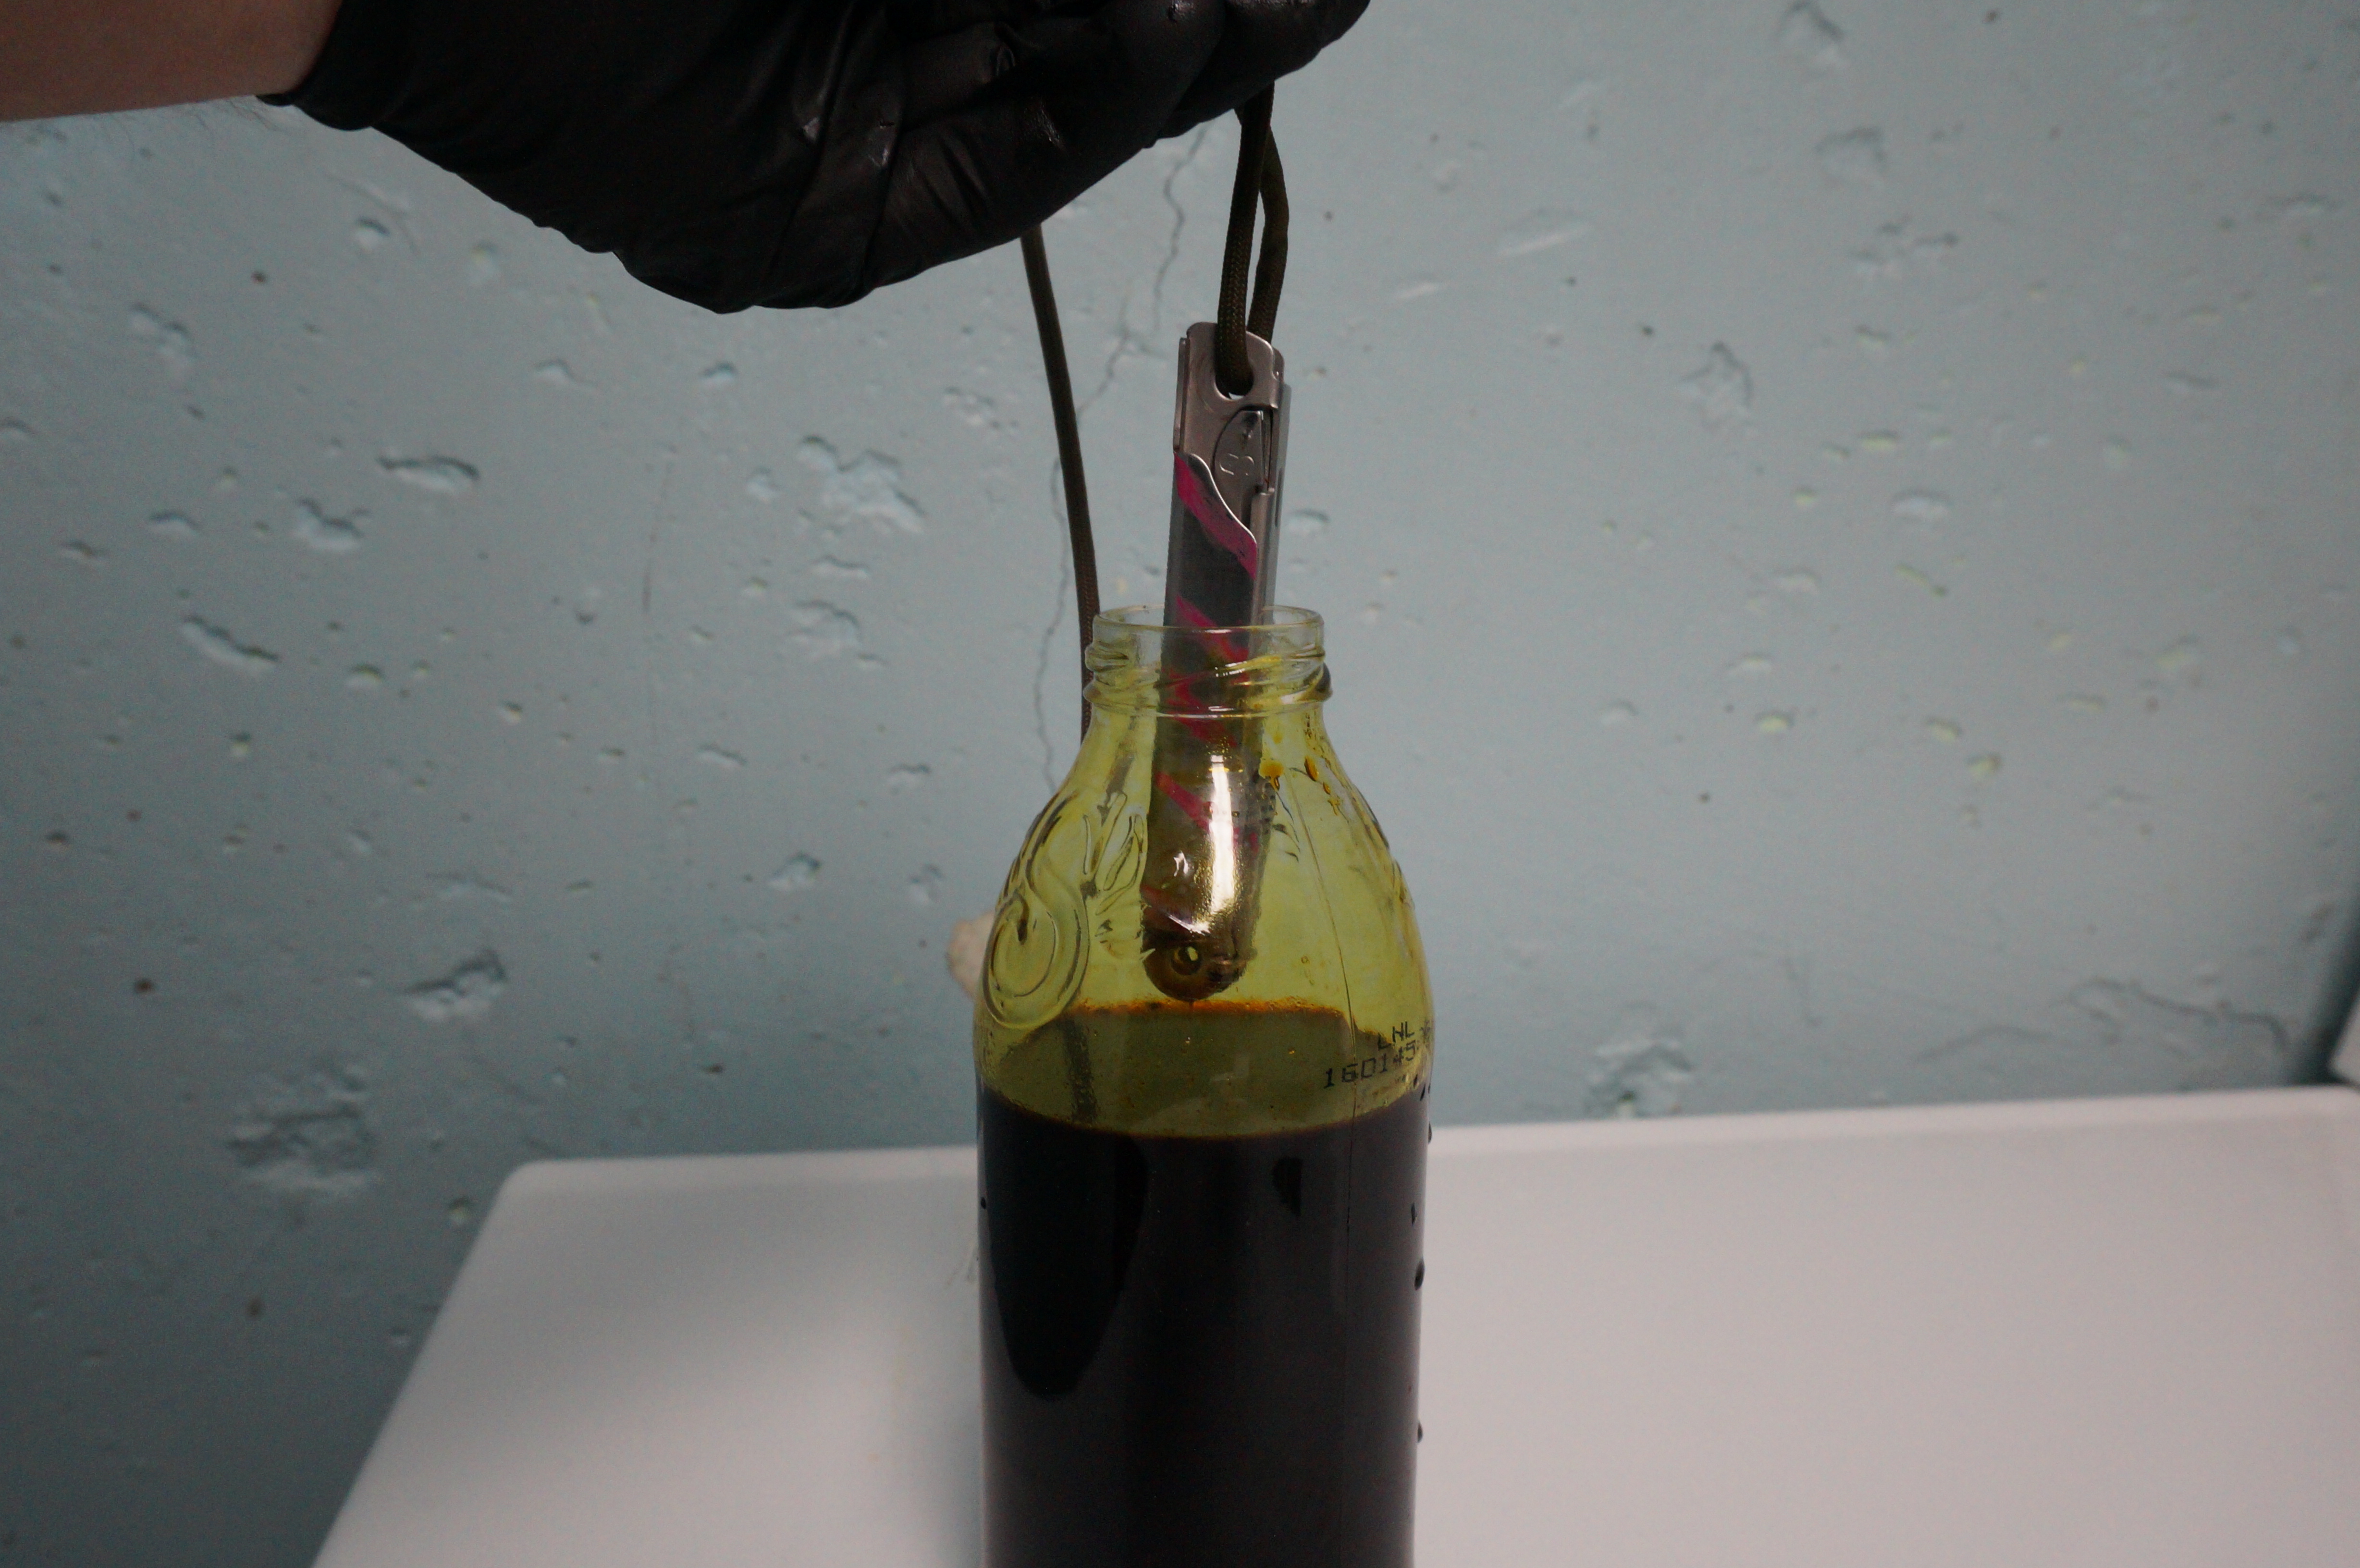
    Dipping the Metal in the Acid Solution

    Dipping the Metal in the Acid Solution

    4. Take a Dip-  Cut roughly six inches of paracord and either loop it through a hole where your grips were attached or tie it around the highest point of the handle. Now depending on how large of a blade you’re etching you may need to pour out some of the etching solution out of the bottle, back into the PCB container. Remember wherever the solution is touching on the metal, it’ll change the color. With that being said, adjust how deep you place the blade in and while holding the other end of the paracord, close the lid. This should secure the blade in the proper position.

    5. Tic Toc- This may the most difficult part of the whole process, waiting. Now how long you leave it in there is debated more than what caliber has more knock down power. I’ve done this a handful of times and the golden number for me has been 25 minutes. If you don’t have the same patience as me, you can take it out after 20 minutes. It gets a little tricky if you pull it out before 20 minutes and usually results in inconsistent coloration. You’ve already invested a bit of time and money into this endeavor and rushing will not help the final result, take the full 25 minutes.

    6. Remove and Reassemble- Now that you let the acid do its job, its time to take it out. After that you’re going to want to rinse it off with running water. Next comes the goof off or nail polish remover, apply a copious amount to a rag and wipe off the nail polish. Be careful when wiping the paint off the blade edge, I’ll be the first to admit I cut myself doing this. Go ahead and reassemble your knife’s handles or the maze of parts that is your multi-tool.
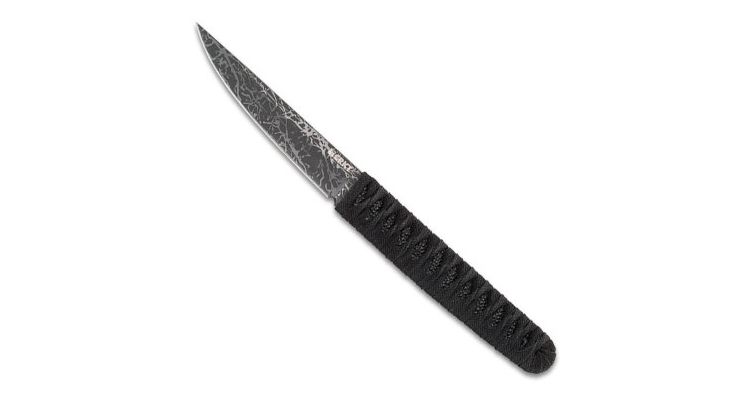
    CRKT Okake

    CRKT Okake

    Show It Off –  Since you’re probably the only guy out of your group of friends with the know-how and sweet new acid etched blade, flaunt it. What’s great about this process is you did it yourself, and it’s one-off. I hope you guys take this information and get to customizing. Let me know what you think about acid etching in the comment box below.


    Show of your work by posting your pictures on the OpticsPlanet Facebook page with hash tag #acidetch.


    12 Comments on How to Acid Etch your Knife or Multi-Tool

    Read More
  • Steiner M30R LRF Binocular

    Steiner M30R LRF Binocular: German Made, Long Range Target Shooter Approved

    May 8 • News • 7098

    I know what you may be thinking, “we know that everything the Germans make is great, tell us something we don’t know.” In all actuality, not everything that’s born wearing the black, red, and yellow flag is that outstanding. All too often I hear of German cars that are plagued with issues that were triggered only after 10,000 miles on the odometer.  That’s not the case with the Steiner M30R 8X30 binocular sporting a built in laser range finder.

    Steiner M30R LRF Binocular

    Steiner M30R LRF Binocular

    Built out of a what Steiner likes to call a “Makrolon” housing, this binocular is meant to withstand an impact of 11 G’s. To put that in perspective for you, a space shuttle launch equates to around 3 G’s of force. It’s safe to say that you’d be hard pressed to damage this bino.  The designers of this remarkable optics knew that a rock solid housing would be of utmost importance to buyers that are dropping used Honda Civic money on a binocular.

    The stout German protection doesn’t stop there, this unit also features a floating prism system and NBR rubber armoring. What does that all mean? The floating prism design utilizes flexible silicone lens mounts so when the klutz in you is in full effect, you don’t have to worry about cracking the high quality aka expensive glass. The NBR rubber coating has proven to be even more beneficial during my testing. Throw em on your dashboard, they stick like glue. Cursed with the sweatiest palms known to man? This rubber armor allows your hand to secure to the housing at some molecular level. It sounds like blasphemy, I know but they adhere to your hand perfectly and feel great doing it.

    Steiner M30R LRF Binocular

    Steiner M30R LRF Binocular

    Honestly some of the features on this binocular I don’t even have to bring up because its a given that they have them at this upper echelon. Let me get down to what makes this unit worth twice the cost of many people’s monthly mortgage. If you couldn’t tell from the third eye on the front of this unit, the “LRF” in the product title stands for laser range finder. To even call this a laser range finder would be doing this binocular a disservice. Laser range finders are what your golf buddies use in attempt to stick shots close to the pin, what this device does should be called “master of all: laser range acquirer.” The powerful class 1 laser on this unit is something of legend, something of god like ability that most of us will never full appreciate and how can we, when it lazes out to 1,860 yards. Majority of us poor souls will never have the opportunity to shoots out that far but if you are that lucky, it’s quite the peace of mind to know that your bino has the capability.

    Where do I think this binocular would shine? Well Steiner glass has always been extremely popular with the military, so that would be my first educated guess. I hate you use the cliché word of “sniper” but I could see this being used by a two man sniper team or SWAT team sniper.  What I find to be the most obvious civilian choice is you long range target shooters and competitors. You may no use every bit of the range that the rangefinder is capable of but the accuracy of the beam is outstanding. What that means is the ability to put shots where you need them, especially when centimeters are the difference between you winning or losing a match.

    If  what you need is :optical clarity, a laser rangefinder of Zeus like power and a housing that’ll withstand more G forces than you could ever replicate , then there’s only one real choice. The Steiner 8X30R LRF may not be the best deal on the planet, mostly because they’re out of this world. Let me know what you guys think of these god like binoculars in the comments below. As always, shoot em straight and be safe!


    No Comments on Steiner M30R LRF Binocular: German Made, Long Range Target Shooter Approved

    Read More