• project childsafe gun safety

    Project ChildSafe: Distributing Gun Safety Locks Since 1999

    Oct 7 • News • 7576

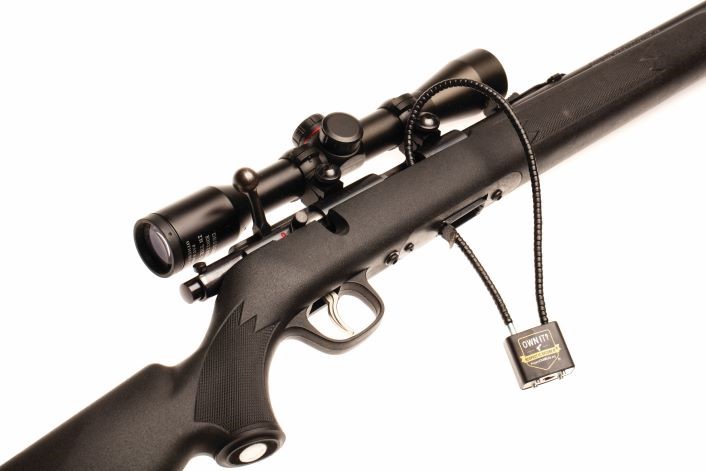
    Project ChildSafe is the most comprehensive gun safety program in the country. Since 1999, organizers have partnered with more than 15,000 police departments across the country to distribute more than 38 million gun safety locks. In this article, we’ll go over the basics of Project ChildSafe plus how it has grown and keeps things fresh as problems change.

    Project ChildSafe

    The National Shooting Sports Foundation, the trade association for the gun industry, founded Project ChildSafe with the initial goal of reducing preventable or accidental gun deaths. Their message was simple: lock up your guns when they’re not in use. 

    NSSF Senior Communications Director Bill Brassard explained they started Project ChildSafe by handing out free gun locks, but the program quickly evolved into more of a national gun safety campaign. 

    “While Project ChildSafe is known for its free distribution of cable gun locks, it really considers itself an educational program and helps gun owners work through what type of secure storage device is best for them whether it’s a cable lock, a lock box, or a full-size gun safe,” Brassard said. 

    He added that through Project ChildSafe, they also regularly release educational videos for children about gun safety and publish materials that guide parents through talking to their kids about guns. 

    Today, Project ChildSafe partners pass out gun locks and gun safety materials at public events like state fairs and at gun stores and police stations in all 50 states. 

    Suicide Prevention

    In 2018, the NSSF expanded Project ChildSafe again by partnering with the American Foundation for Suicide Prevention for suicide awareness. Before the partnership, the gun industry was largely apprehensive to address the issue even though the majority of gun deaths each year are suicides. 

    “With those organizations, we’ve developed a tool kit for retailers and shooting ranges built around a theme of ‘have a brave conversation’ because it’s important when you see somebody struggling to reach out and open the lines of communication,” Brassard said. 

    Brassard explained they teach gun sellers how to help family and friends put time and distance between a person who is having suicidal ideations and a firearm. He added if you let that moment of acute crisis to pass, you give that person time to receive professional care and hopefully address whatever issue they have.

    Brassard explained the partnership gives their message clout. “We’re not experts on suicide, but the NSSF’s role is that we are the trusted messenger to deliver this information to the gun community,” he said. 

    The Big Challenge

    The NSSF’s biggest challenge of managing Project ChildSafe is keeping the message out there. “It’s not a task that can be accomplished with one campaign message during the course of the year,” Brassard said. “It’s gotta happen more frequently.”

    To keep the message alive and well, the NSSF works with their partners to promote multiple campaigns each year like during hunting season or summer break. They’re especially concerned about stretches of time when kids might be home unsupervised. 

    Nonetheless, Brassard said the campaigns are always designed “to remind parents to make sure their guns are stored properly.”

    For More Information

    Although the NSSF relies on grants and private donations to fund Project ChildSafe, the project is largely funded by gun companies and retailers (including OpticsPlanet). To learn more about Project ChildSafe and how you can help, check out the project’s website at https://projectchildsafe.org/

    No Comments on Project ChildSafe: Distributing Gun Safety Locks Since 1999

    Read More
  • sousa optics lpvo scope unboxing

    Sousa Mantis LPVO Scope Review: An Affordable AR Optic

    Aug 30 • Reviews, Rifle Scopes • 9888

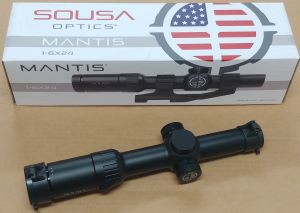
    The SOUSA Mantis 1-6×24 is a 30mm lightweight LPVO scope with capped turrets, illuminated BDC (ballistic drop compensator) second focal plane reticle, and includes AR scope caps. LPVOs (low-powered variable optics) are nothing new to the industry, and having a 1-6x option with a fantastic reticle that doesn’t empty your wallet is always a good thing. 

    sousa optics mantis lpvo ar scope mounting

    Initial Impressions and Setup

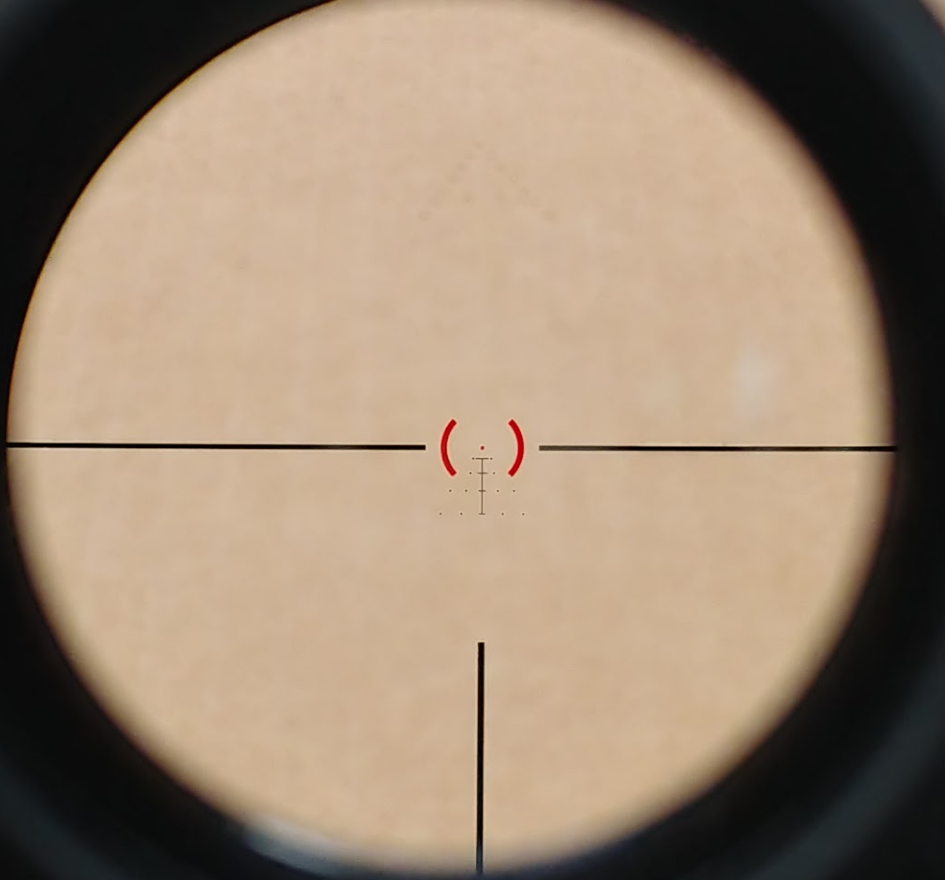
    Like many LPVO scopes, the Mantis comes in a common tube size (30mm) which is a great choice since there are a variety of mounting options for different rifles. The reticle is slightly different from other traditional MIL/MOA reticles since it is a BDC with half-circle or horseshoe-like brackets which came in handy once I hit the range. The brightness settings go from 0-11, and I was pleasantly surprised at not only which parts of the reticle lit up, but also how bright it got overall. 

    sousa lpvo scope reticle

    Reticle at brightness setting 6 on 1x

    Zeroing the scope wasn’t an issue, and I enjoyed the positive, tactile clicks compared to some offerings in this price range that are mushy and can leave you second-guessing how much the turret was actually moved. 

    sousa mantis lpvo scope cap

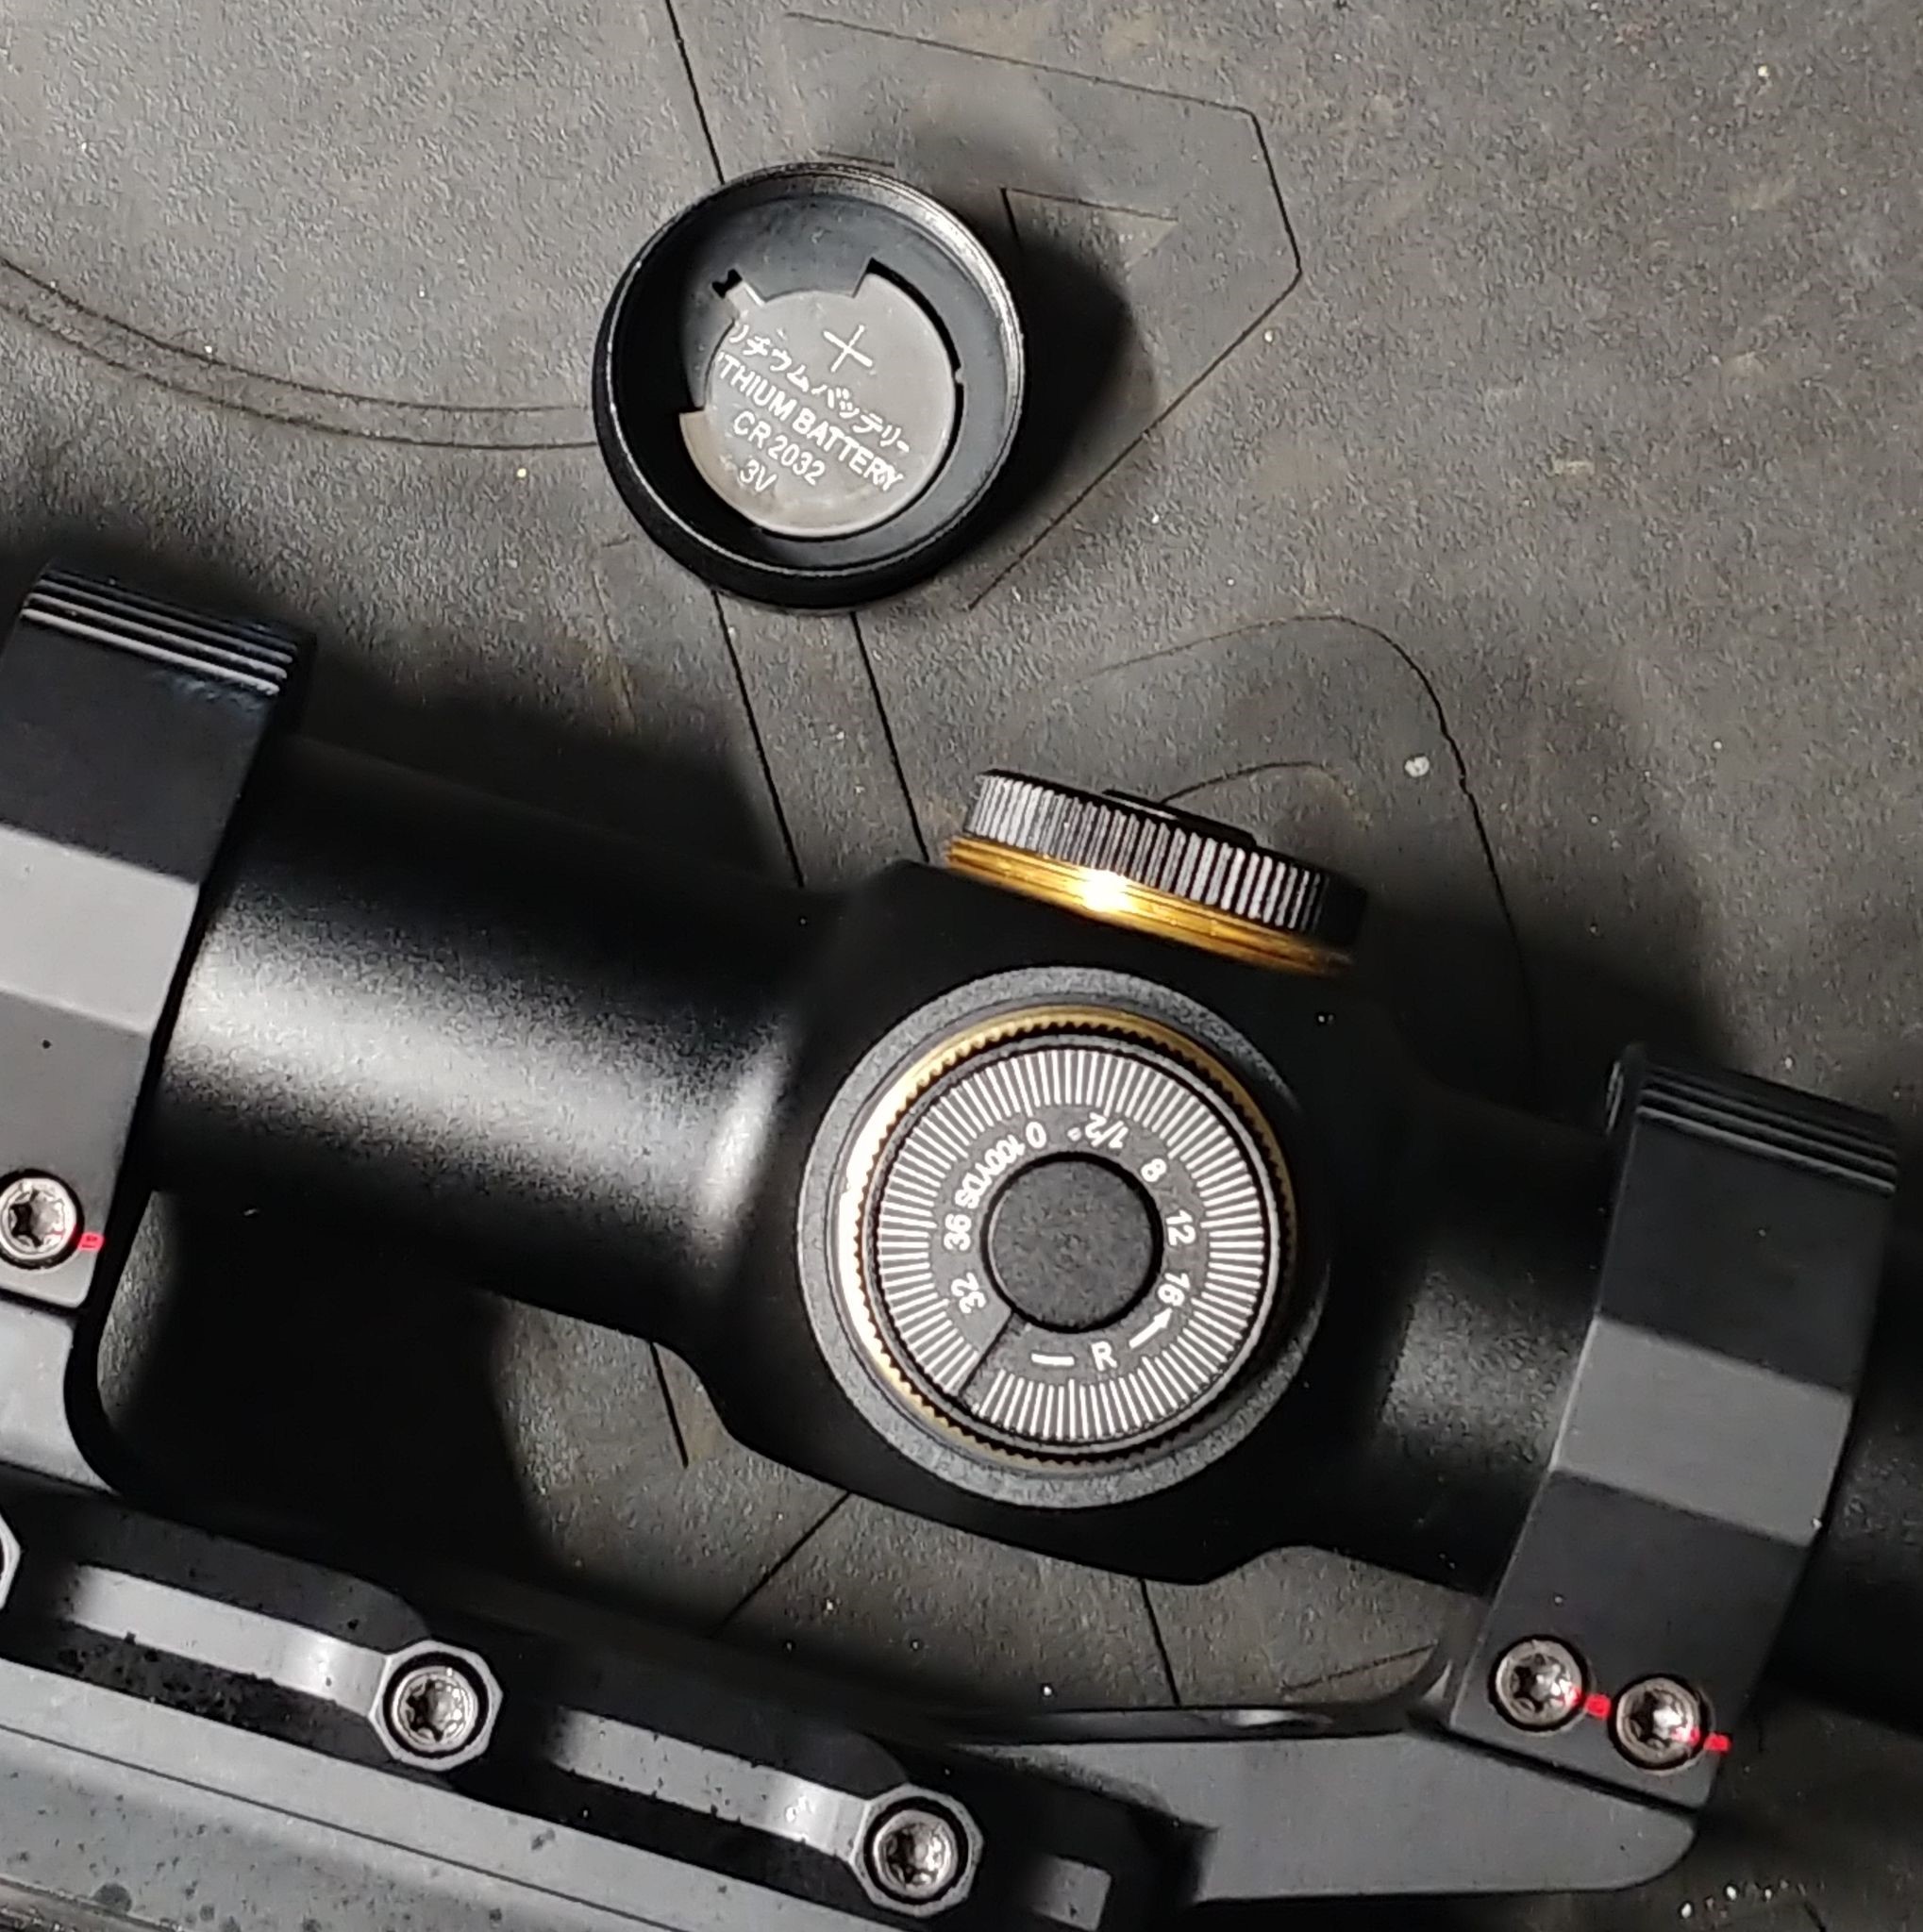
    One feature I wasn’t expecting, and did not notice until I went to zero the optic, was that the windage cap contained an extra battery. 

    SOUSA Mantis LPVO Scope in Action

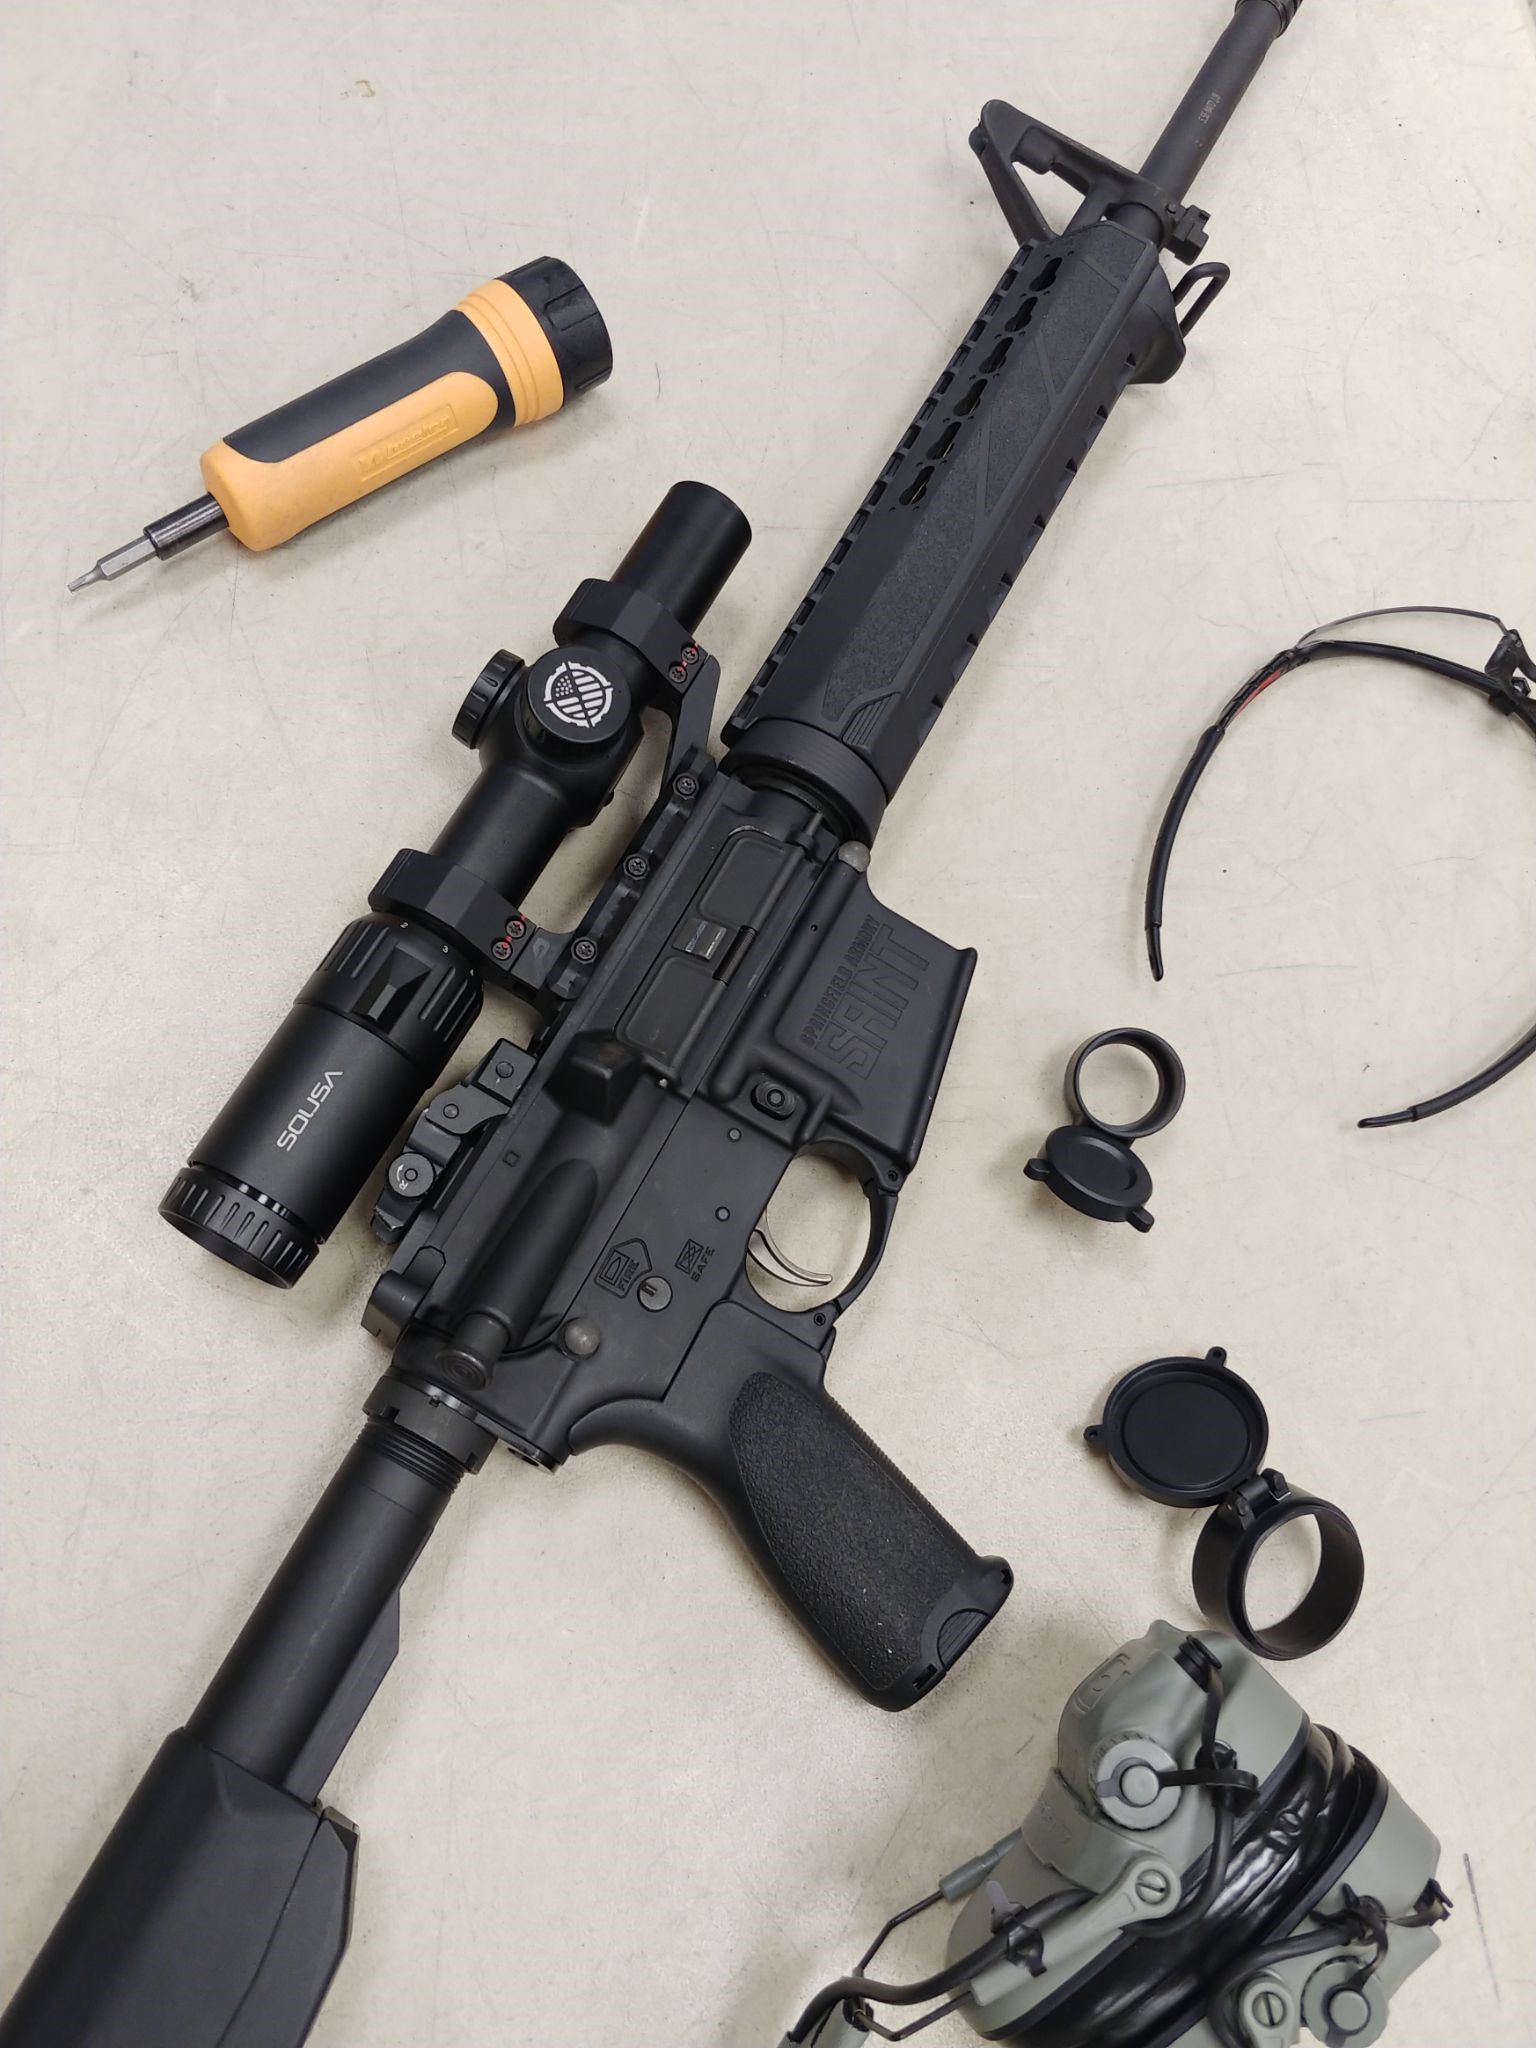
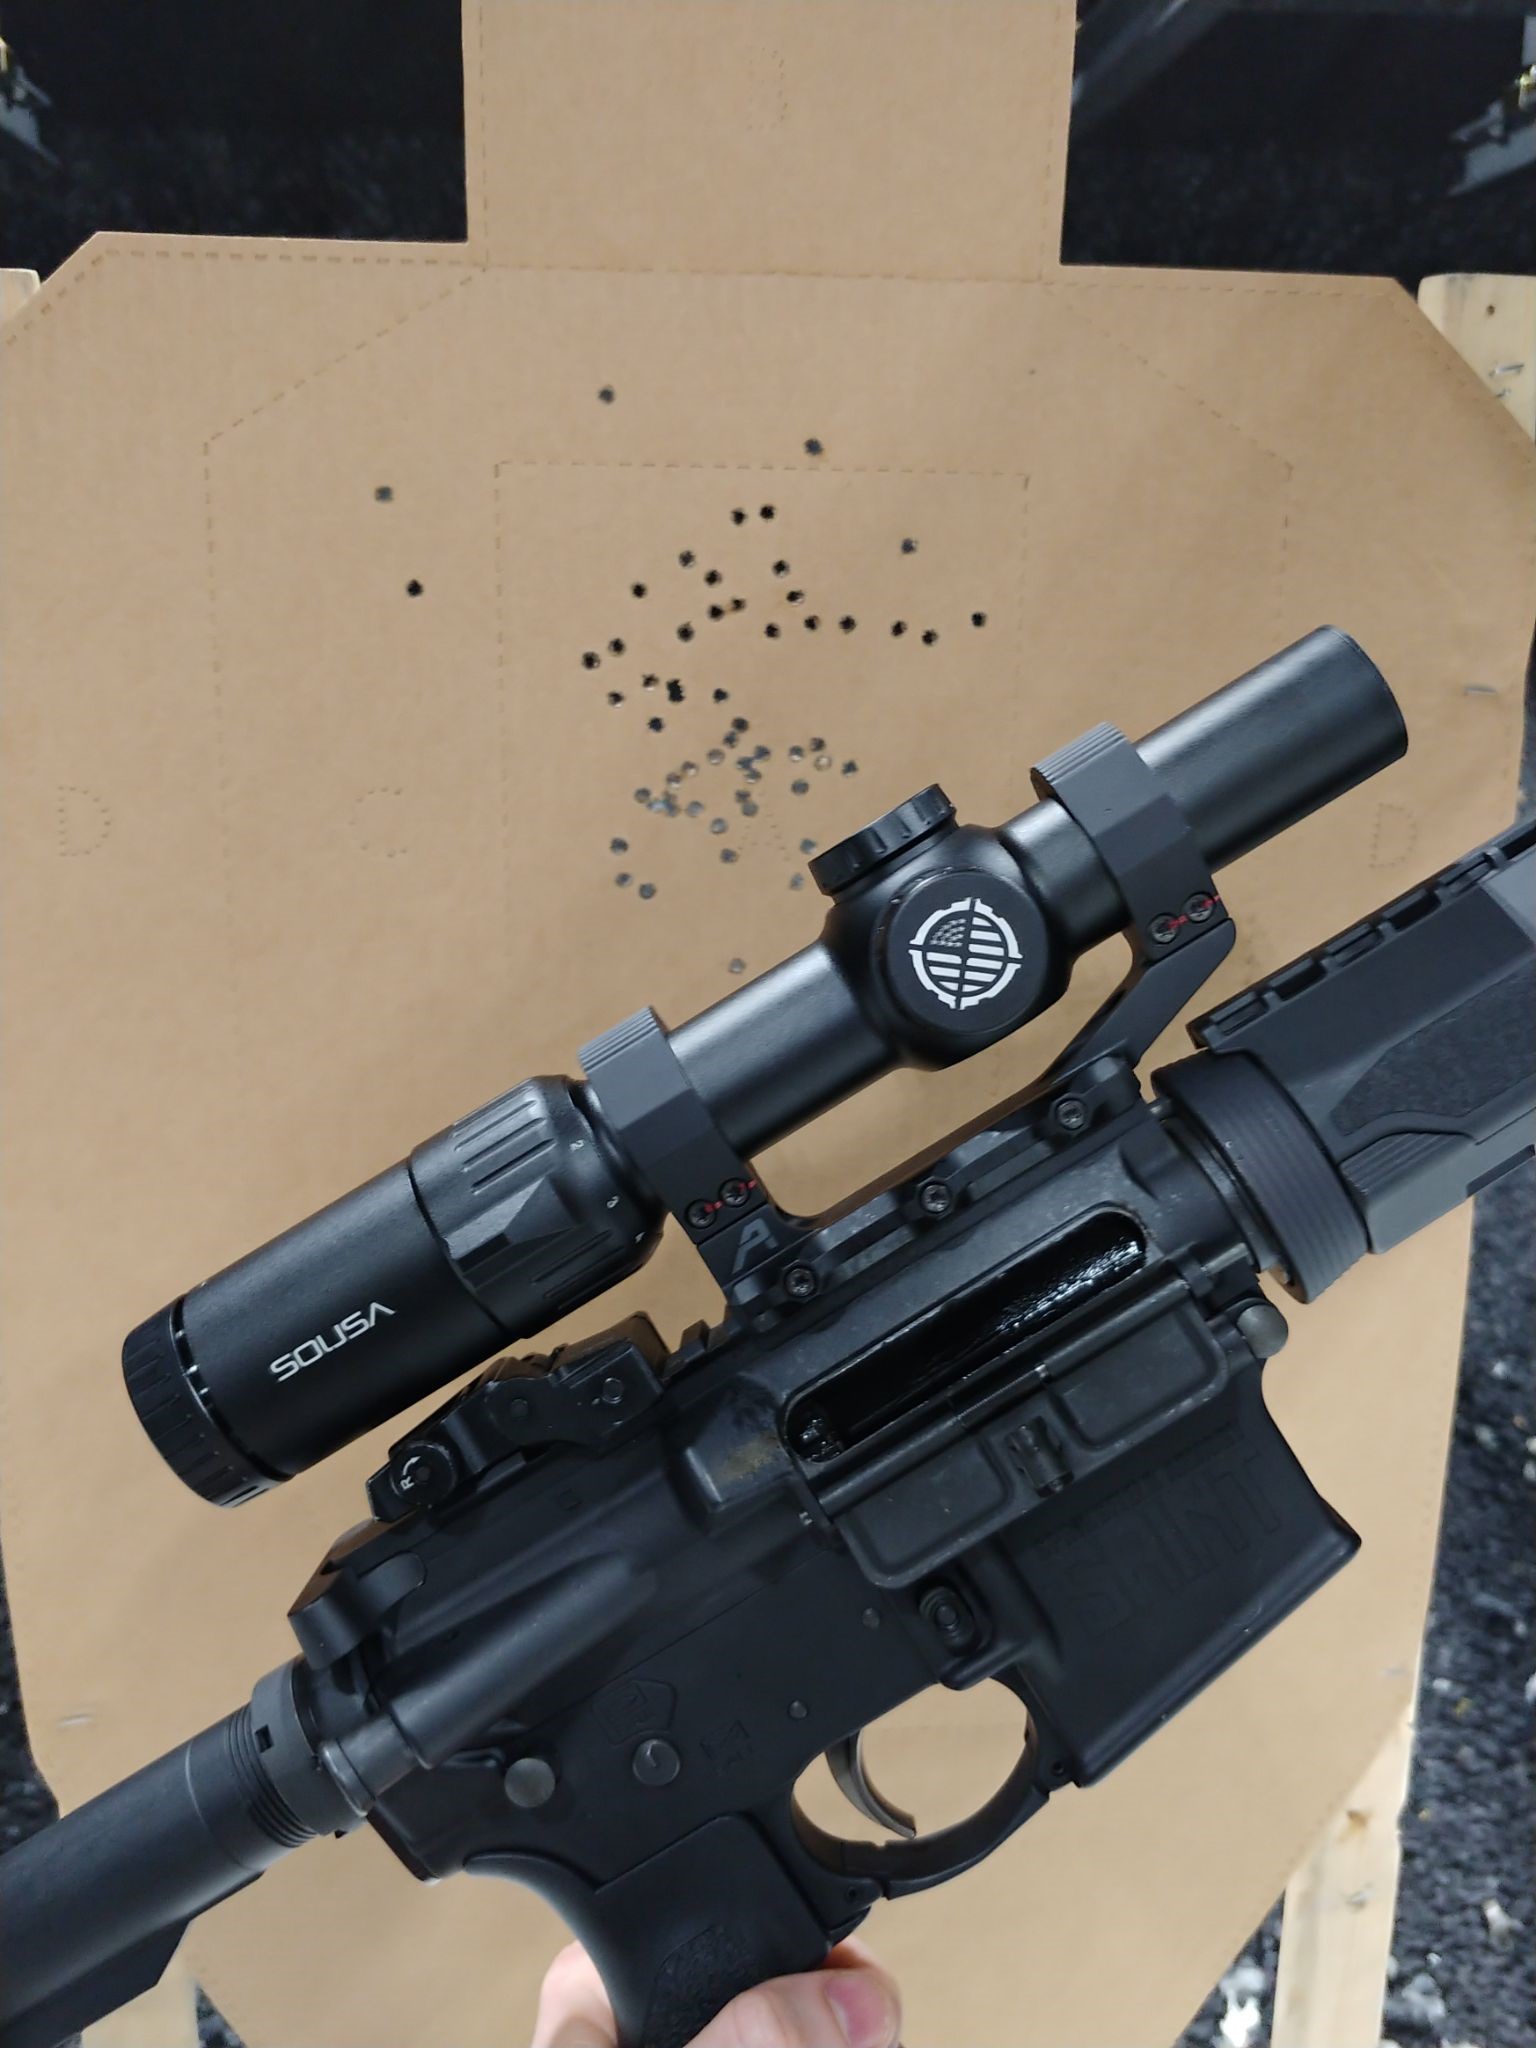
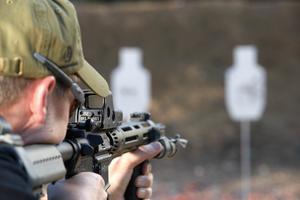
    After zeroing, I ran the Mantis on a 16in AR-15 for the initial 60-round course of fire that I like to use for practice. The reticle was more than bright enough, and I didn’t need to use it above setting 8. I was also surprised to see how fast I could use the Mantis’ reticle — it perfectly brackets the A-zone on a USPA/IPSC target at 10 yards on 1x magnification.

    lpvo scope ar optic target

    An LPVO Scope Built for Any Budget

    The Sousa Mantis LPVO is a great AR optic for those that either want to try out an LPVO scope and are unsure if they want to spend over $1,000 or anyone who wants a quality rifle optic that provides plenty of versatility in a lightweight and easy-to-use package. 

    No Comments on Sousa Mantis LPVO Scope Review: An Affordable AR Optic

    Read More
  • Understanding Different Types Of Triggers & How They Work

    Aug 24 • Gun Parts, Triggers • 16961

    Understanding different types of triggers is an important part of learning about guns. The trigger is the primary control of a firearm. It’s the thing that you use to operate the gun. Sure, there might be a safety switch, you might have to manually cycle the action, and you definitely have to aim the sights, but the trigger is the one and only thing that makes a firearm do what it was designed to do.

    If you’re new to shooting, you probably haven’t given the trigger much thought, but you will over time. Trigger pull is one of the most widely discussed topics among firearm enthusiasts. So, we put this article together to give you a crash course on triggers. The different types of triggers on a firearm include:

    • Handgun
      • Single-Action Trigger
      • Double-Action Trigger
      • Double-Action Only Trigger
      • Striker-Fired Trigger
    • Rifle
      • Single-Stage Trigger
      • Two-Stage Trigger

    How Does A Trigger Work?

    How a trigger works depends on the type of trigger it is, which we’ll get into later, but in general, a full trigger pull unleashes a cascade of events that result in the gun firing. 

    When a modern firearm is at rest, the part of the trigger mechanism called the sear blocks the hammer. Depending on the design, the sear is part of the hammer, trigger, or a separate part entirely. 
    double-action revolver

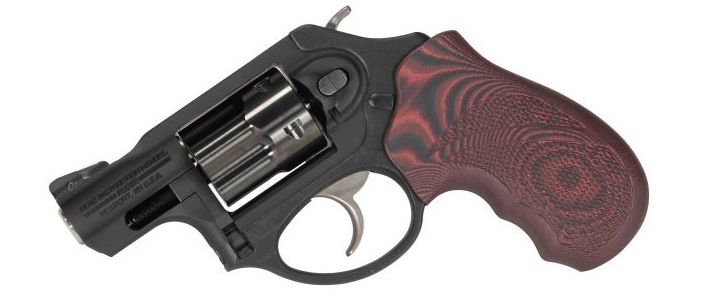
    This revolver is equipped with a double-action revolver, meaning a full pull completes two actions such as the hammer going back and then forward.

    (However, older weapons, like the classic six-shot revolvers of the cowboy era, didn’t have a sear at all. As a result, the hammer needed to rest on an empty chamber.)

    When you pull the trigger, it moves the sear and unblocks the hammer. Without obstruction, the hammer, which is under spring tension, immediately drives forward.

    The hammer will travel until it hits the firing pin, which will pierce the back of a cartridge and cause another chain reaction inside the round, and end with a bullet flying down the barrel.

    The Mechanical Stages

    Now that you have a general idea of how a trigger works, we will break down the process in more technical terms, so you will, at the very least, understand what gun people are saying when they speak the lingo. 

    • Pre-Travel, aka trigger slack, is when you pull the trigger, but don’t yet engage the sear. The trigger will feel springy or squishy. It ends once you engage the sear, aka hit the wall
    • Take-Up, aka trigger creep, is what you feel when you actually engage the sear. You will feel resistance, aka pull weight (measured in pounds), in the trigger.
    • The trigger will break after you push the sear out of the way. Here, the hammer immediately springs forward. On an unloaded gun, you’ll both feel and hear the break. It’s like two metallic fingers snapping. 
    single-stage trigger

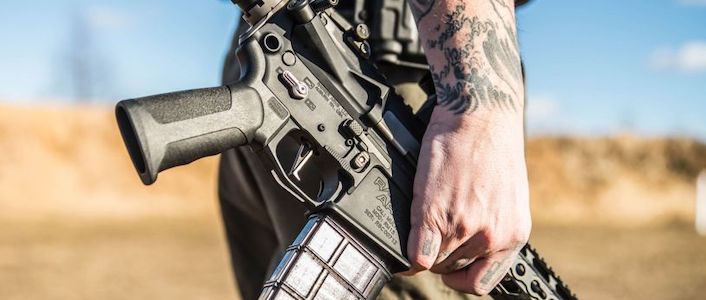
    This rifle is equipped with a single-stage trigger, so all the mechanical stages happen throughout the trigger pull.

    • Over-Travel is the amount the trigger moves after it breaks. There’s usually less resistance than the pre-travel stage, but the pull will completely end when you hit the frame or a trigger stop. 
    • Trigger Reset happens when the action cycles and you release the trigger. Cycling the action will push the hammer back behind the sear.  

    One thing to note about this process is that not all firearms use a hammer. Some pistol designs use a striker instead. The mechanical process is similar, but the main difference is the striker actually strikes the cartridge’s primer instead of a firing pin. 

    Different Types of Triggers

    There are multiple types of triggers, and while they may sound the same, they aren’t exactly the same. They have different names depending on the firearm type. 

    Handgun Triggers

    There are three different kinds of handgun triggers: single action, double action, or striker-fired. You’ll find the first two triggers on hammer-fired handguns, so all revolvers and some pistols. The third you’ll find on striker-fired handguns, so most modern duty or Glock-like pistols. 

    Single Action Trigger

    For a single-action trigger, imagine a character in an action flick holding a revolver. He’s angry and threatening another character. He’s not getting the answers he wants and he’s running out of options. To show that he’s serious, he cocks back the hammer, so the gun has a hair-trigger.
    single-action trigger

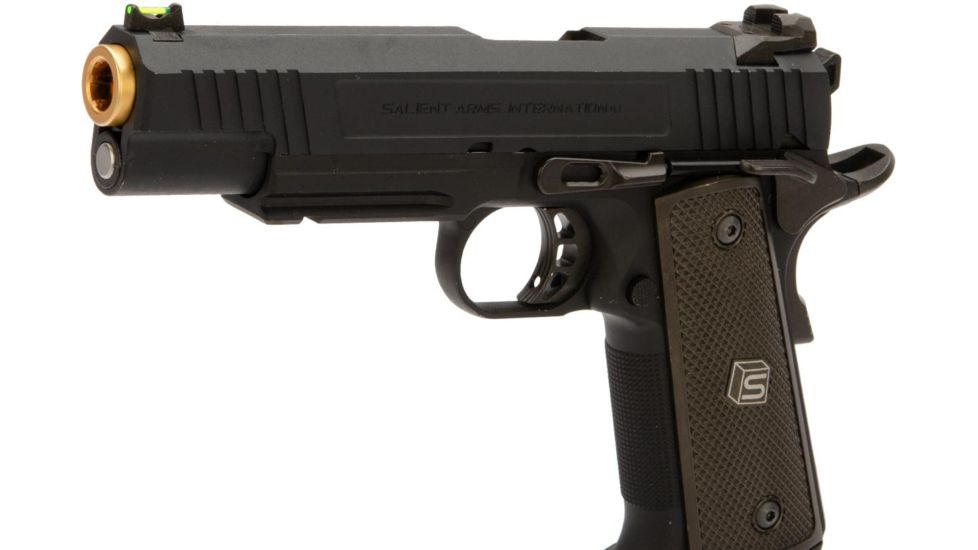
    Like all 1911 pistols, this trainer has a single-action trigger. Unlike a double-action trigger, a single-action just snaps the hammer forward.

    This is an example of a single-action trigger. A single-action trigger pretty much mirrors the above description about how a trigger works. The gun is cocked and ready to rock. You just pull the trigger for immediate action. 

    Double-Action Trigger

    Now, for a double-action trigger, think of that same character, but instead of cocking the hammer back, he just starts squeezing the trigger. He’s demanding answers or otherwise he’ll shoot. The camera zooms in on the trigger as he slowly pulls it to the rear. The hammer is also reaching back. 

    This is an example of a double-action trigger. It has a long pull because it requires two actions to fire. The first action cocks the gun and the second fires the gun. The double-action trigger exists primarily for safety reasons. It takes a lot of effort to complete the pull (though, you should still follow gun safety rules and keep the safety on if the gun has one). 

    There’s also a double-action only trigger, or DOA trigger, but that simply means that you cannot cock the gun manually. You can only fire it as a double-action trigger.

    Striker-Fired Trigger

    As we already mentioned, some firearms use a striker instead of a hammer and firing pin. Nonetheless, a striker-fired trigger will still have slack, creep, break, over-travel, and reset.
    striker fire trigger

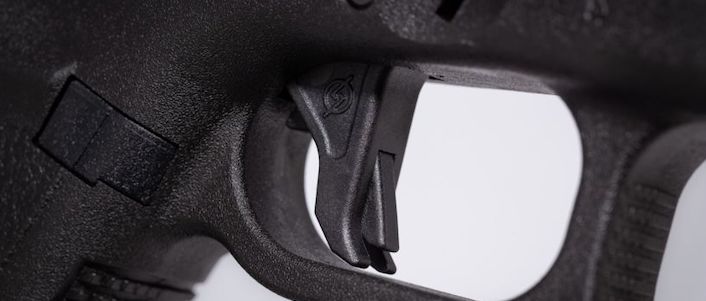
    A striker fire trigger has a trigger safety rather than a manual safety. It’s sometimes compared to a double-action trigger.

    The main difference, though, is that instead of a manual safety, a striker-fired trigger will have a trigger safety or passive safety. It usually looks like a smaller trigger on the trigger itself. It physically blocks the trigger from moving, but you disengage it as soon as you put your finger on it. 

    Rifle Triggers

    There are two types of rifle triggers: a single-stage trigger and a two-stage trigger. When compared to handgun triggers, a single-stage trigger and single-action trigger are fairly identical in performance, but there’s a mechanical difference between a two-stage trigger and double-action trigger. 

    While a double-action trigger has two actions — cocking and firing — a two-stage trigger separates the mechanical steps. The first stage incorporates the pre-travel, so all that’s left is the take-up and break.

    When you complete the first stage on a two-stage trigger, you’ll feel and hear a click, which signals stage one completion. Precision shooters often prefer to use two-stage triggers because they get a better idea of when their rifle is going to shoot. They pull to complete stage one and might hold the trigger until they’re ready to fire. 
    two-stage trigger

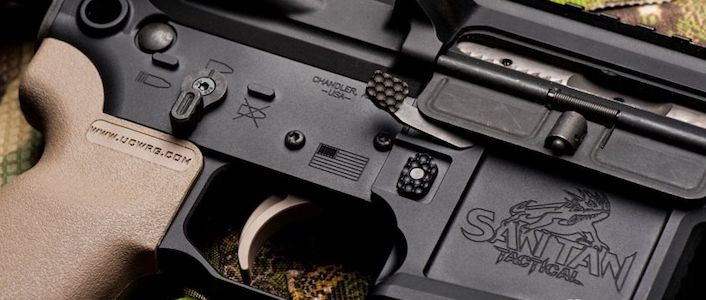
    A two-stage trigger on an AR-15 rifle, so the pre-travel is contained in the first stage and the take-up and break are in the second stage.

    Trigger Time

    The goal of this article was to introduce what a firearm trigger is, how it works, and the different types of triggers that exist. If you have other questions about gear or training, check out the library of How-To Guides on OpticsPlanet and the GearExpert blog, or send them directly through our Contact Us page. 

    No Comments on Understanding Different Types Of Triggers & How They Work

    Read More
  • How To Draw A Pistol From A Holster Step-By-Step (Video)

    Aug 24 • How-To, Firearms Training, Videos, At the Range, Dry Fire • 8430

    Learning how to draw a pistol from a holster is an important part of marksmanship and self-defense training. Mastering this skill will not only make you a safer gun handler, but you’ll also have an easier time setting up your shot. However, it takes practice to be proficient at it. This article will cover how to draw a pistol from a holster from an open carry position and a concealed carry position. 

    Drawing A Handgun Step-by-step

    At the end of the day, drawing a pistol from a holster is a relatively simple task. You’re basically just pulling it out while you get into a shooting position. But doing it safely and proficiently requires a fair amount of technique. Therefore, we’re going to give you step-by-step instructions for drawing a handgun. These include:

    • Gripping your pistol,
    • Removing it from the holster,
    • Adding your support hand,
    • And, pushing out to aim.

    Each step is designed to give you more and more control of the pistol before taking a shot. 

    Before You Draw

    Before you draw, it’s best practice to begin by getting into a shooting position. You do this by separating your feet about shoulder-width apart and placing your strong foot behind you. Next, you should lean forward and put a slight bend in your knees. 

    A shooting position is essentially a fighting or athletic stance like the way a boxer or baseball player stands. By positioning your body this way, you’re in a better position to absorb and control recoil. 

    Where To Put Your Hands

    You’ll want to position your hands in a way so you can access your firearm without waving your support hand in front of the muzzle. You can avoid doing this by placing your palm on the center of your chest. 

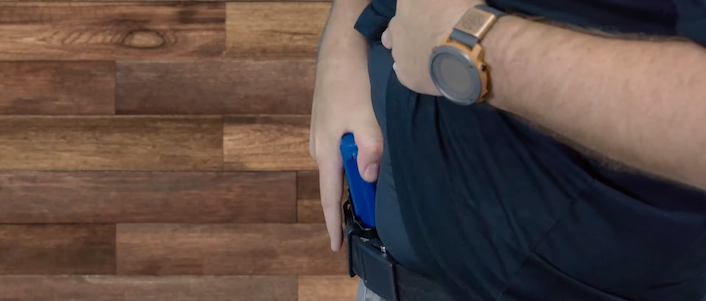
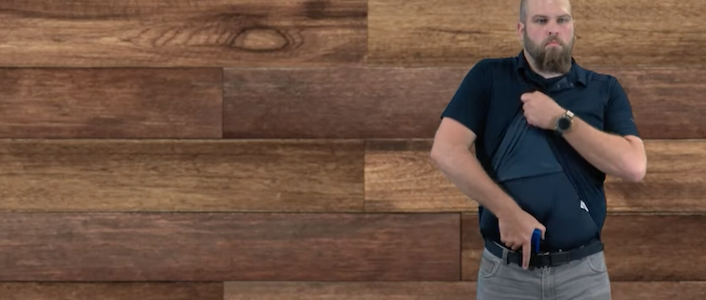
    If you’re carrying concealed, though, you will do this naturally because you’ll need to use your support hand to lift your shirt so you can access your firearm with your dominant hand. In other words, just keep your support hand in place until step three. 

    Step One: Gripping

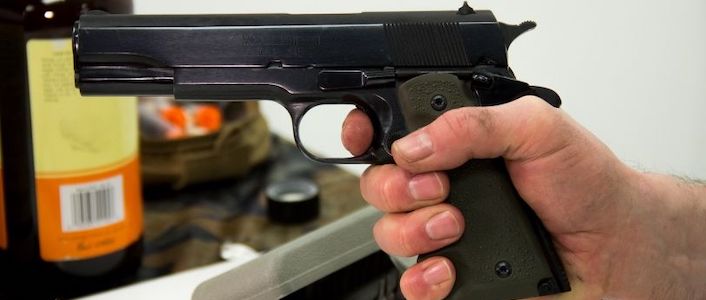
    The point of step one is to establish a high, firm grip on the pistol. 

    For the high part, place the crook of your hand on the beavertail and wrap your bottom three fingers (middle, ring, and pinky) around the grip. And, just like you would when you hold a gun, keep your trigger finger straight. 

    drawing a pistol from a holster

    The instructor is lifting his shirt during a pistol draw from a concealed position. This technique not only clears the way for a pistol draw, but also ensures that he won’t flag his support hand with the muzzle.

    For the firm part, you’ll have to find what’s right for you. You’ll want to grab it hard, but you don’t need to white-knuckle it. 

    And there’s one last step if you have a duty retention holster like ours from Safariland. In order to draw the pistol, you have to unlock it by depressing a button. It’s usually located where your thumb or index finger lands.

    Step Two: Removing

    For step two, we’re simply removing the gun from the holster. 

    With a duty retention holster, that means pressing the release button and then pulling up so the muzzle clears the holster. 

    You should also maintain your high, firm grip and your index finger should continue to be straight and off the trigger. 

    Quick note: while you should be as methodical as possible during practice, you might end up combining steps one and two after you develop better technique. 

    Step Three: Support

    After you draw your handgun, rotate the gun about 45 degrees by dropping your elbow. You should, however, keep it pointed down range at all times. 

    Next, guide your handgun toward your support hand. Once in place, you should use your support hand to cup your weapon hand. By the end, your thumbs should be parallel and the base of your palms pressed together.

    Drawing a pistol from a holster

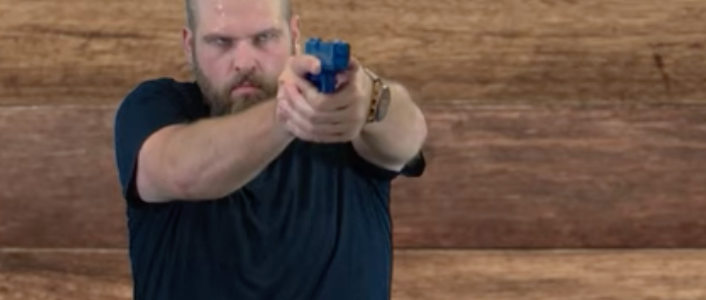
    In the fourth and final step, the instructor demonstrates the pushout. Before he fires the handgun, he aligns the sights onto his target.

    If you’re able to establish positive control with both your dominant and support hands before you shoot, you reduce the need to re-adjust your grip after you shoot. 

    Step Four: Pushout 

    The final step is the pushout, so extend your elbows and position your pistol so you can see the sights.

    If you did all four steps correctly, you will have a secure grip and can focus on aiming, so begin getting sight alignment and sight picture. When you’re ready, take your shot. 

    Re-holster

    To re-holster, you simply reverse the steps, but instead of watching your target, you can look at what you’re doing so you safely and correctly guide your pistol back into the holster. 

    Parting Shots

    While everyone aspires to be fast, the immediate goal when drawing your pistol should be smooth, fluid movement. That way, you will get your gun out safely and give yourself a better chance of hitting your target.

    For more tips on training and gear, check out our library of How To Guides and GearExpert, or if you have questions, send them directly through our Contact Us page. 

    No Comments on How To Draw A Pistol From A Holster Step-By-Step (Video)

    Read More
  • pistol red dot sight

    What Is a Red Dot Sight Good For?

    Aug 16 • Optics, Red Dot Sights • 12896

    Red dot sights improve your accuracy and target acquisition during close to mid-range engagements. While there are red dot scopes with higher magnification powers, most red dot optics offer 1x magnification, which is perfect for pistols, shotguns, and some rifles depending on the application. Even though these sights don’t get you closer to your target, they provide numerous advantages that can greatly enhance your aim and performance. In this guide, we’ll break down the benefits of using red dot sights and help you figure out if red dot optics are the ideal choice for you and your weapon. 

    What Is a Red Dot Sight?

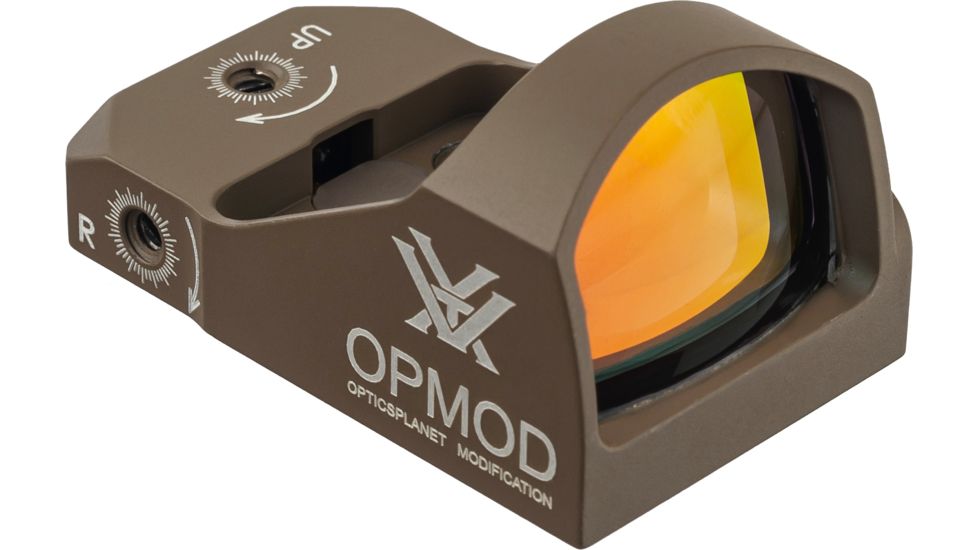
    Knowing what a red dot is and how it operates will help you understand the many benefits of using one. A red dot sight is a weapon optic, usually 1x magnification, that projects a bright dot-shaped reticle. They can replace your iron sights, or you can get a co-witness mount to use a red dot in conjunction with your iron sights. Either way, red dots provide a clearer field of view and a more precise point of aim than iron sights alone.

    How Does a Red Dot Sight Work?

    Not all red dots are the same, and the type of sight you choose will impact how it functions. There are three main types of red dot optics:

    • Reflex Sight
    • Holographic Sight
    • Prismatic Sight


    reflex red dot sight

    Reflex sights use an LED emitter to project the reticle onto a lens, which reflects back into the shooter’s eye to provide a precise aiming point.

    holographic red dot sight 

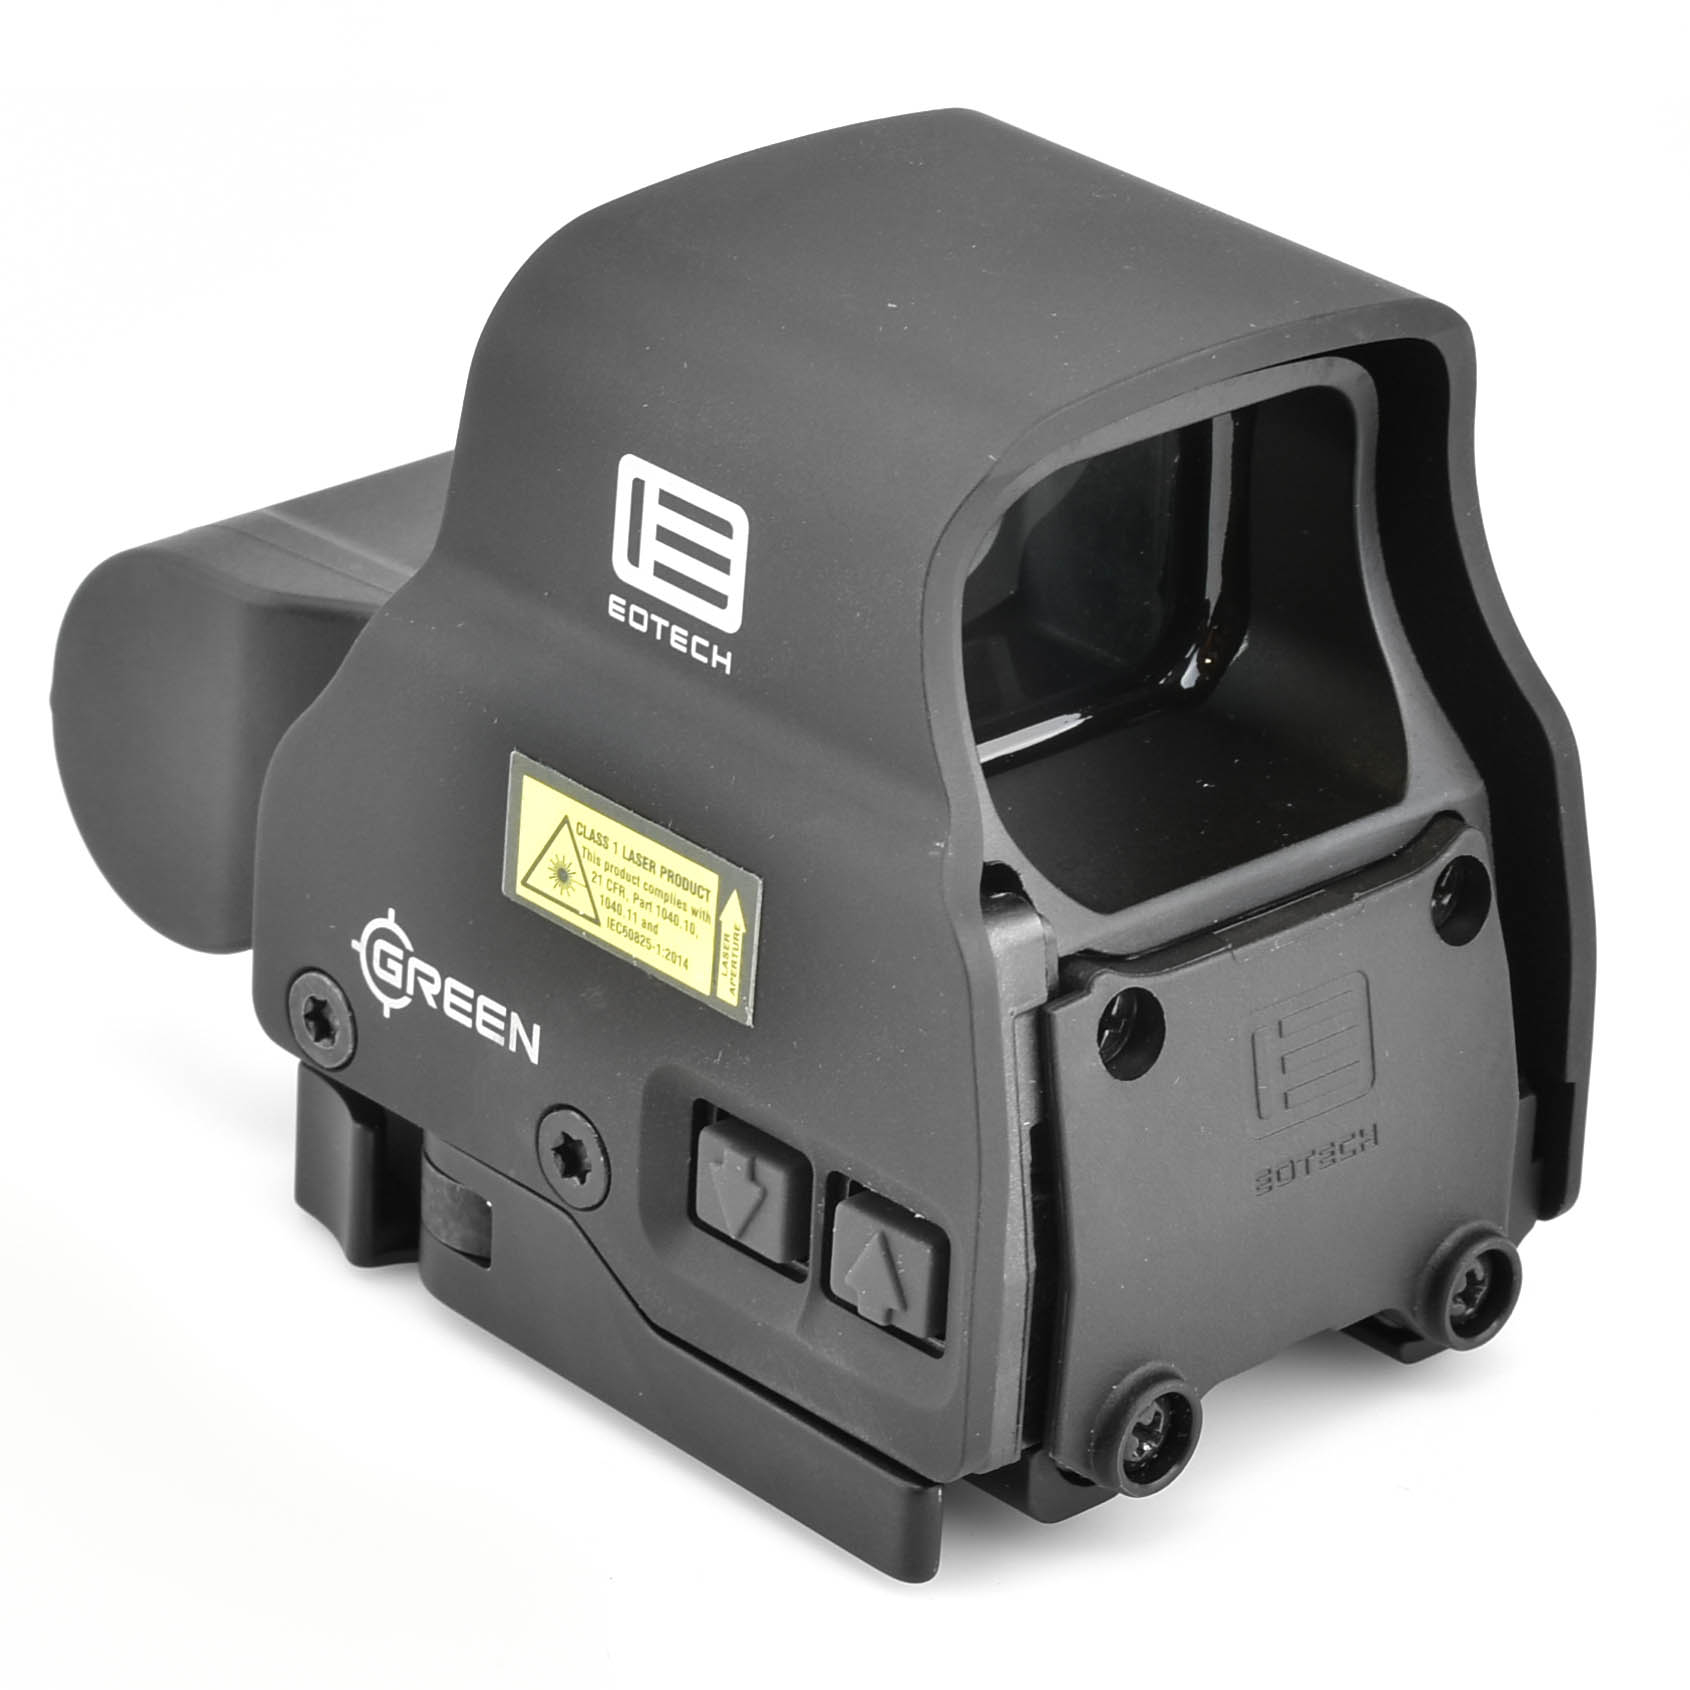
    Holographic weapon sights were created by EOTech and use laser-based holographic technology to project an image of the reticle within the sight. Unlike reflex optics, holographic sights display a reconstructed image of the reticle instead of directly reflecting the image to your eyes. 

    prismatic red dot scope

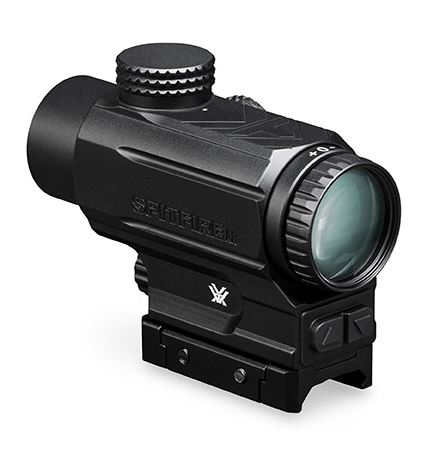
    Prismatic sights provide a solid middle ground between reflex/holographic sights and riflescopes. These red dot scopes have an etched reticle, which means you can still use them without illumination, and they are most commonly designed with 1-5x magnification. 

    No matter which type of red dot you choose, they all offer similar benefits in terms of improving your accuracy and speeding up your target acquisition times.

    Benefits of Using a Red Dot Sight

    Iron sights can be clunky and obstructive, and they are difficult to aim with if your vision isn’t up to par. Using a red dot with or instead of iron sights can greatly improve your overall weapon performance.

    Simplicity 

    Iron sights rely on your ability to line up all components for maximum precision. Red dot sights cut out the middleman and just give you the aiming point up front. This allows you to center all of your focus on your shot instead of lining everything up. A red dot makes acquiring and tracking your target much easier than just using iron sights.

    Improved Accuracy

    Another thing about iron sights is that you need to be aware of your focal plane when using them. With red dot optics, you don’t. This eliminates human error from manual sighting that can impact accuracy, and red dot reticles are notably precise once they’ve been properly zeroed (sighted in).

    Faster Target Acquisition

    red dot sight target acquisition

    A high-quality red dot has a crisp, bright reticle that can be easily seen in nearly any lighting condition. Your eyes are instantly drawn to the aiming point, and the reticle is incredibly accurate, which provides more confidence to take the shot quicker.

    Shoot with Both Eyes Open

    Red dots are specifically designed for shooting with both eyes open, unlike iron sights and most riflescopes. Shooting with both eyes open allows you to maintain maximum situational awareness with a full field of view. Mounting a red dot sight on your pistol is a great idea for self-defense scenarios because you can precisely aim at any threats without losing sight of what’s around you.

    Better Vision in Dark Environments

    A bright red dot reticle is much easier to see than iron sights in low-light conditions. This is another reason red dot optics are ideal for home-defense firearms.

    Red Dots Get the Green Light

    Whether you own a pistol, rifle, or shotgun, red dot sights are an excellent optic for close to medium-range encounters. Reflex, holographic, and prismatic sights are unique in their own ways but provide the same advantages. They are easy to operate, remarkably accurate, help you quickly acquire targets in any lighting conditions, and they can be used with both eyes open. Come check out our guide on How to Choose a Red Dot Sight for more information on these amazing optics, and shop for red dot sights when you’re ready to upgrade your sighting experience!

    No Comments on What Is a Red Dot Sight Good For?

    Read More